Showing posts with label Illinois. Show all posts

Wednesday, October 16, 2013

Sweet Corn Custard Pie with Tomato Jam

Sweet Corn Custard Pie, Overhead

I grew up with corn all around me, but I was allergic. To corn and milk and grass and dust--a tough diagnosis for a Midwestern girl. At a certain point of my childhood, though, the doctor declared me free of some of these allergens, corn included, and the first time I ever had corn on the cob, I overzealously ate the whole thing, cob and all. At my grandmother's house, we played hide and seek in the stalks with the farm boys down the road, and though we weren't really a casserole family, when I got a recipe from a classmate's mother for corn pudding, it became my signature dish at holidays and family gatherings.

I haven't lived in the Midwest since college, but I have an inkling there's something going on there amidst the corn fields and dairy farms. Organic farms, distilleries, and local restaurants are popping up, native seeds are being saved, heirloom crops are being grown again, and people are taking pride in Midwestern food. Perhaps in all of that there's a small dose of nostalgia, faux or real, that our generation is inclined toward, but this revival moves way beyond the casserole dish.

The Hoosier Mama Book of Pie Cookbook

One of the women who seems to be part of that movement is Paula Haney of Chicago's Hoosier Mama Pie Company. When I had a chance to sit down with her earlier this spring, she talked about her motivations in starting her bakery, a primary one being to bring awareness and appreciation to the "poor foods" of the United States, specifically the Midwest (read more from our conversation here).

Paula's new cookbook, The Hoosier Mama Book of Pie does just that, while also being a great go-to resource of traditional and creative pies for any home baker, offering seasonal recipes from classic Cherry to Red Line Espresso Cream.

Sweet Corn Custard Pie, Side View

The first recipe I tried was this Sweet Corn Custard Pie with Tomato Jam. Maybe part of my selection was guided by a Midwest nostalgic pang for the corn puddings of my youth, but the dessert is also unique and different, a new take on tradition. It also just seemed to be a good place for an (eventually) corn-fed Hoosier like myself to start.

The pie is a dream and a bit of a sleeper hit, but it's a delightful surprise when you slice it to reveal the light creamy custard speckled with fresh corn kernels. It's a sweet with a touch of savory, especially with the spicy sweet tomato jam drizzled atop.

Sweet Corn Custard Pie, Cross Section

Sweet Corn Custard Pie with Tomato Jam
Adapted from The Hoosier Mama Book of Pie

For the pie:
Ingredients
Nothing-in-the-House pie crust, halved
1 1/2 c. fresh sweet corn kernels
1 1/3 c. heavy cream
1/3 c. whole milk
1/2 c. + 2 Tsp. granulated sugar
1 tsp. vanilla paste
Pinch kosher salt
Pinch fresh ground black pepper
Pinch nutmeg
4 large egg yolks
2 large egg whites

Directions
1. Prepare half of the Nothing-in-the-House pie crust as per the directions, reserving the leftover egg for an egg wash. Chill dough at least 1 hour before rolling out and fitting into a greased and floured 9-inch pie pan. Pierce the bottom of the shell all over with a fork, and let chill for 15 more minutes in the fridge. Meanwhile, preheat oven to 325.

2. Place 3/4 c. of the corn kernels, 1/3 c. of the heavy cream, milk, and sugar in the bowl of a food processor. Pulse 2-3 times until the corn is finely chopped.

3. Transfer the mixture to a medium bowl. Stir in the remaining 1 c. of the heavy cream, vanilla paste, salt, black pepper, and nutmeg. Add the egg yolks one at a time. Stir in the remaining 3/4 c. of the corn kernels.

4. Whip the egg whites into soft peaks and fold into the corn mixture in 2 additions.

5. Pour the filling into the pie shell and bake immediately for 50-55 minutes until the edges of the pie are slightly puffed and the custard moves in 1 piece when the pie is gently shaken. 

6. Cool to room temperature, then chill in the fridge overnight before slicing. Serve with tomato jam.

For the tomato jam:
Ingredients
1/2 c. + 2 Tblsp. granulated sugar
4 pinches cayenne pepper
4 pinches fresh ground black pepper
2 pinches kosher salt
Juice of 1 orange
Juice of 1 lemon
20 cherry tomatoes, halved

Directions
1. Combine the sugar, spices, salt, orange juice, and lemon juice in a medium saucepan. Remove any stray citrus seeds.

2. Cook over medium-high heat, stirring often, until the mixture comes to a boil. Turn the heat down and simmer for 1-2 minutes, until the mixture has thickened slightly. 

3. Gently toss the tomato halves into the hot mixture. Continue to simmer until the mixture becomes thick and syrup like, about 30 minutes. 

4. Remove from heat and cool to room temperature. Serve with the Sweet Corn Custard Pie.

Sweet Corn Custard Pie with Tomato Jam Slice

Related recipes:
Hoosier Sugar Cream Pie
Kentucky Lemon Chess Pie
Maple Bourbon Buttermilk Pie
Sweet Tea Pie

Saturday, July 13, 2013

Cheap Tart Bakery's Dinah Grossman on Rhubarb

Diced Rhubarb in Bowl with Sugar and Zest

When I embarked on my Chicago Pie Tour back in March, one pie slinger I sadly missed is the suggestively named Cheap Tart Bakery. Owned and operated by pastry chef Dinah Grossman, Cheap Tart offers up sweet and savory pies, galettes and tarts, hand pies and pie pops, all made-to-order with seasonal, local ingredients and available for delivery within Chicago's city limits. For all you Windy City dwellers, that means you could have fresh Ginger Cream Pie, Apple Tarte Tatin, or Maple Pecan Pie Pops (and much more) appear on your doorstep in 48 hours.

Though I didn't get to make an order when I was there, Dinah has written up a lovely little post about her love of rhubarb which developed while she was growing up in rural Maine. Then, she shares her recipe for a beautiful Rhubarb Tart.

Cheap Tart Bakery's Rhubarb Tart
"Before starting my pie business, I didn’t give much thought to why pie was the thing I always chose to bake. I liked to eat it, of course, and I enjoyed the tactile elements--rolling out the crust, with its pale flecks of butter showing through, slicing ripe peaches, squeezing the pits from juicy tart cherries. But perhaps more that those things I found it comforting to have a pie nearby. It wasn’t so much that pie reminded me of someone in particular (I do not come from a long line of pie makers), but through its ingredients, a pie connected me to a sense of place. I just felt better with on around.
            
I grew up in rural Maine, surrounded by acres of woods, fields, and orchards. In our family we mapped much of that land by referring to perennial edible landmarks--the blackberry patch, a particular apple tree, or the place where the rhubarb reappeared every spring. I would keep a watchful eye on these particular locations, making sure I knew when the blackberries or apples were almost ready so I never missed them at their peak. Often, impatient for the fruit to ripen, I would sample a berry or apple too soon, the intensely sour bite of the juice becoming, over the years, as welcome a taste as the mellow sweetness that followed a couple of weeks later. To this day I prefer fruits with a pronounced acidity, which explains my affinity for that tartest of pie ingredients: rhubarb.

Of all the edibles whose progress I monitored, rhubarb could be counted on to appear first and was ready to be harvested long before anything else. It was also plentiful, the long stalks and elephantine leaves growing at a pace even our steady pie baking couldn’t match. During rhubarb season a pie was almost always on the kitchen table. And not just at our house. For many of our neighbors, too, a rhubarb pie became as ubiquitous as the salt and pepper shakers on the counter. When only a slice remained in the Pyrex plate, someone inevitably walked outside and pulled another armful of stalks from the ground to be baked into a replacement.


Cheap Tart Bakery's Rhubarb Tart

Aside from pie, I enjoyed rhubarb best pulled straight from the ground, the end dipped in a small bowl of dark brown sugar. As kids, my ordinarily health-conscious mother would let us take our treat outside, where a stalk of rhubarb dipped then chewed and sucked on, became an activity as well as a snack. My favorite spot to sit and chew was inside a horseshoe of lilac bushes growing around an enormous rock in our yard. Surrounded by the heady smell of those pale purple flowers, the sweet and sour rhubarb would take on another taste altogether.

Like all favorite foods my love for rhubarb is inextricably connected to these memories. It is impossible to make a rhubarb pie without also remembering the cold, day-old slices eaten in my neighbor’s kitchen, how somehow the sweet-tart filling and crisp edges of crust tasted better a day after the pie was made. I can’t rinse a haul of farmers market rhubarb without also remembering the feeling of walking barefoot through the tall, wet lawn by our barn to pull up the shiny stalks, the squeak and snap as each came away from the plant. It’s been more than ten years since I lived near that patch, but as I bake my way through a third year of business I’m reminded of why I chose this pastry among all others to guide me. In a third floor Chicago apartment with no balcony or back yard maybe I can’t grow my own fruit, but I can mark the seasons by making pies from rhubarb, then strawberries, then peaches. If I can’t ground myself through the ground, I’ll do it with pie."

Post and photos by Dinah Grossman of Chicago's Cheap Tart Bakery. Find Cheap Tart online and on Twitter, Facebook, and Instagram.


Cheap Tart Bakery's Rhubarb Tart Slice

Rhubarb Tart
From Dinah Grossman of Cheap Tart Bakery

Ingredients
For crust:
8 Tblsp. unsalted butter, cold, cut in the 1/2'' cubes
1 1/3 c. + 4 tsp. pastry flour
1/4 tsp. kosher salt
1 Tblsp. granulated sugar
1 Tblsp. apple cider vinegar
1 c. ice water

For the filling:
4 c. rhubarb, cut into 1/2'' chunks
2/3 c. + 1 Tblsp. granulated sugar
Pinch kosher salt
4 Tblsp. tapioca powder
1/4 orange zest
2 Tblsp. fresh squeezed orange juice (about half an orange)
1 Tblsp. all-purpose flour
1 Tblsp. whole milk or cream for brushing

Directions
For crust:
1. In a bowl of a food processor combine the flour, salt, sugar, and butter. Pulse until the butter is broken down to the size of small peas.

2. Add the cider vinegar to the ice water and stir. Add 3 Tblsp. of the water/cider mixture to the food processor and pulse to moisten the flour mixture. If the mixture still looks dry and powdery, add more water a teaspoon at a time. The dough should just hold together when you squeeze a small amount in your hand, but it should not be sticky and should not form a ball in the food processor. When the mixture looks crumbly and slightly darker in color, it's done.

3. Dump the crumbs into a big mixing bowl and pack them into a rough ball. Wrap the ball in plastic wrap and use the plastic to help you flatten the dough into a disk. Refrigerate at least 1 hour, preferably overnight.

For filling and assembly:
1. Combine all ingredients in a bowl except 1 Tblsp. of the sugar an flour. When the rhubarb pieces are coated in the tapioca/sugar mixture, set aside.

2. Toll the pie crust into a circle about 1/8'' thick. The crust should hang over the edges of the pie pan by about an inch and a half all the way around. Place the crust in the pie pan, and sprinkle the Tblsp. of flour and 2 tsp. of sugar on the bottom.

3. Preheat oven to 400 degrees F. Add the rhubarb mixture to the crust, mounding the filling slightly in the center. Starting with the edge of the crust farthest from you, fold the edge over the filling, then rotate the pan slightly and fold the crust over again, repeating all the way around. The crust will overlap at each fold. Brush the crust with the milk or cream, and sprinkle the remaining teaspoon of sugar over the top.

4. Bake at 400 for 25 minutes with the oven rack on the bottom rung. Reduce oven temperature to 375 and bake an additional 20-25 minutes (moving the tart to the middle rack of the oven), or until the crust is a deep golden brown and the juices are bubbling. Cool completely before slicing.

Related recipes:
Four and Twenty Blackbirds' Rhubarb Pie
Rhubarb Meringue Tart with a Pecan Shortbread Crust
Simple Rhubarb Tart

Wednesday, April 10, 2013

Hoosier Mama's Hoosier Sugar Cream Pie

Hoosier Mama's Hoosier Sugar Cream Pie

I'm a bad Hoosier. For someone who studies and champions local identity, this is a bit of a hard thing to understand about myself, but it's true. I just don't have much pride for my home state. Growing up, I imagined I'd live in the big city of Chicago, and as soon as I graduated high school, I made a beeline across the border to Michigan-- a state I considered--and still do--much cooler (to be fair it was only about 5 miles away from where I grew up). To counteract this, though, I keep a running list of "cool" things (besides my family) about Indiana when I discover them, things to be proud of about my home state. To date, it includes: Kurt Vonnegut, Michael Jackson, Janet Jackson, Johnny Appleseed, and Ball Jars.

Hoosier Mama Pie Company

Also on that list: Paula Haney and Hoosier Mama Pie Company. Granted, the shop is actually in Chicago, but Paula is an Indiana native, incredible pie baker, and someone who reps hard for the state and does a lot to celebrate its food history. We also have a similar interest in valuing home bakers and traditional recipes, both love an all-butter crust, and share a common love for rhubarb. Score one for the home team.

Pie Crusts at Hoosier Mama Pie Company Hoosier Mama's Funeral Pie

Though I'd been there before, and we occasionally share pie curiosities via the internet, In February, I finally had the chance to sit down with Paula for a slice of pie, and a face-to-face chat about her bakery. There in the bay window of the small shop, she told me that one of the reasons she started her shop is that she felt that while here in the states we were acknowledging the poor foods of other countries, we weren't recognizing those of our own country and region. For her (like me), pie was something that was always present at every holiday, it was something simple, rooted in tradition, where home bakers took what they had, and made something out of it. At the shop she offers some of these simple home recipes-- things like Oatmeal Pie, Vinegar Chess Pie, and Hoosier Sugar Cream, which she invited me back to the kitchen to bake.

Apple Pie at Hoosier Mama Pie Company
Hoosier Sugar Cream Pie and Lemon Meringue Pie at Hoosier Mama Pie Company

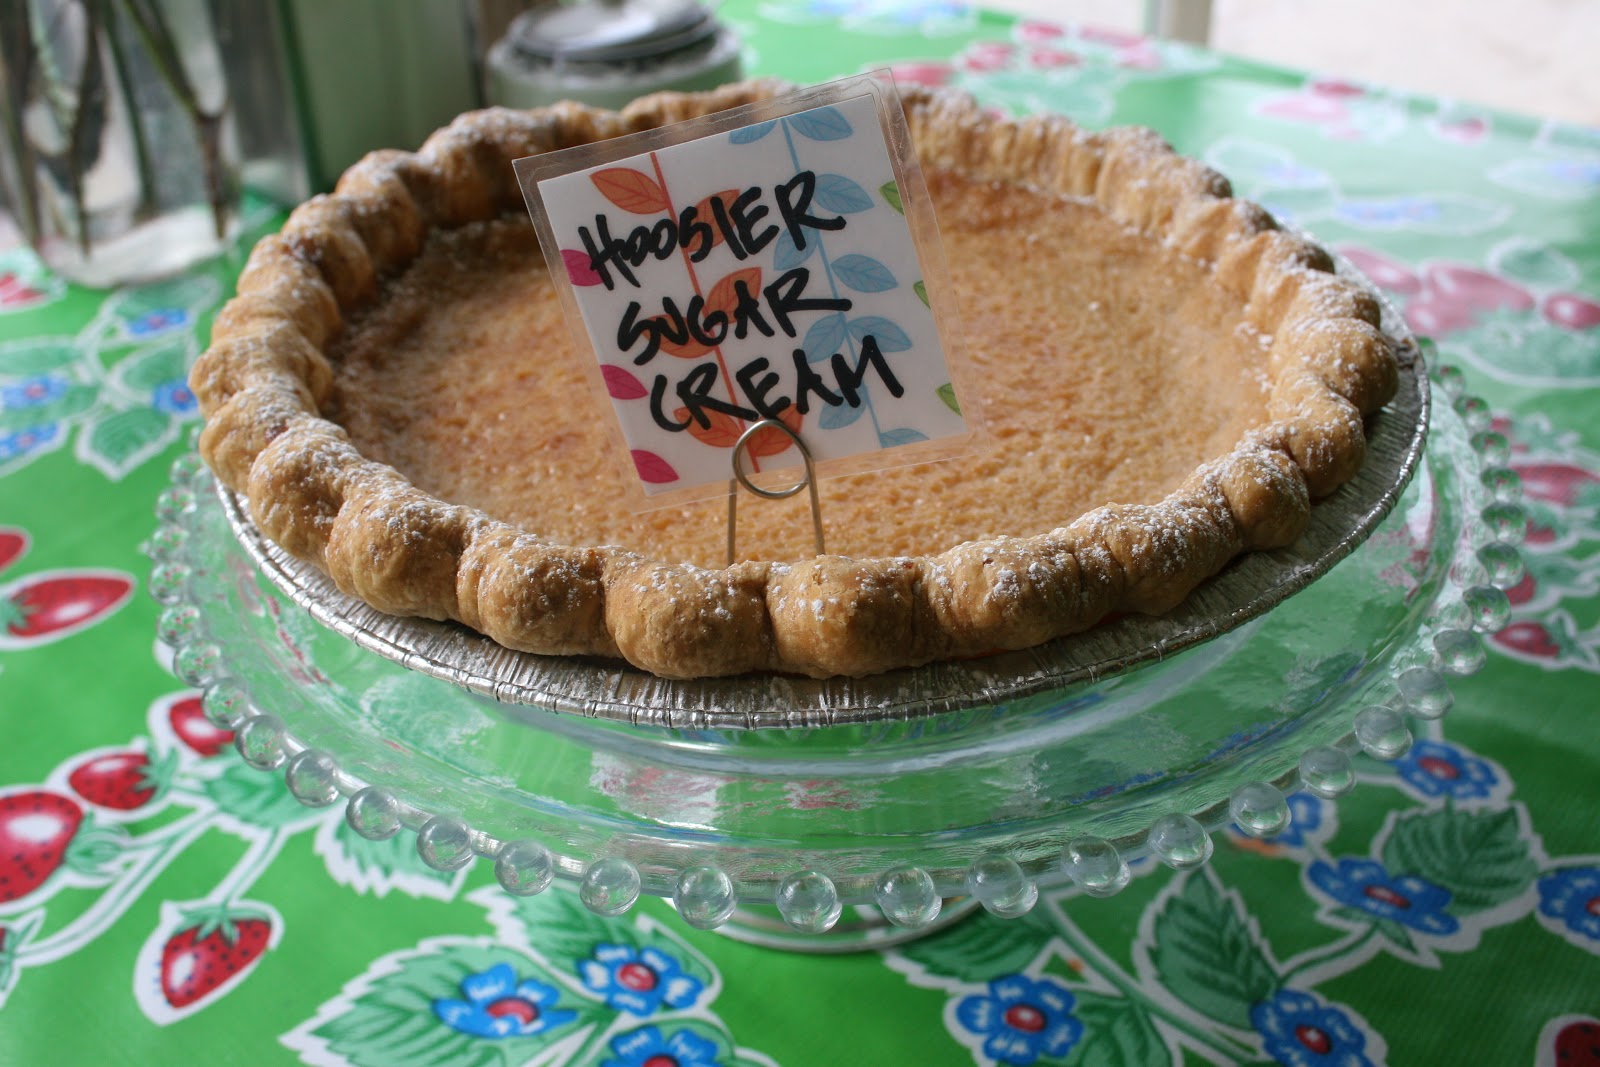
Hoosier Sugar Cream Pie, which Paula found in the 1965 edition of the Farm Journal Pie Cookbook, is a true "desperation pie," listed as a historical oddity. The story goes that Indiana farm wives would throw all of the ingredients in the pie shell, stir it with their fingers, throw it in the oven, and go back out into the fields. Whatever the story, it is shockingly simple, and though not much of a looker, it's quite a pleasant surprise when you taste the rich caramel custard flavor of the smooth, oozy filling.

Hoosier Mama's Hoosier Sugar Cream Pie

Hoosier Sugar Cream Pie
Via Hoosier Mama Pie Co.

Makes 1, 9-inch pie

Ingredients
Nothing-in-the-House pie crust, halved
1/2 c. granulated sugar
1/2 c. dark brown sugar, packed
2 Tblsp. all-purpose flour
1 pinch kosher salt
2 c. heavy cream
1 tsp. vanilla paste or extract

Directions

1. Prepare half of the Nothing-in-the-House pie crust as per the directions. Chill dough at least 1 hour before rolling out and fitting into a greased and floured 9-inch pie pan. Pierce the bottom of the shell all over with a fork, and let chill for 15 more minutes in the fridge. Meanwhile, preheat oven to 375.

2. Line chilled pie shell with parchment paper and pie weights or dried beans. Bake for 10 minutes just until edges begin to brown. Remove from oven, and take out parchment and dried beans. Let cool.

3. Preheat the oven to 400 degrees F. In a medium mixing bowl, combine sugars, flour, and salt. Use a whisk or your hands to break up any clumps and combine ingredients.


4. With a wooden spoon, gently stir in the heavy cream. Do not overmix--whipping the cream will prevent the pie from setting. Stir in the vanilla paste or extract and mix to combine.


5. Pour filling into the pre-baked pie shell. Bake pie for 20 minutes. Rotate pan 180 degrees and bake for 20-25 minutes more, until large bubbles cover the surface. Pie will be quite jiggly and will not appear to be set when it comes out of the oven.

6. Let pie cool to room temperature and refrigerate at least 4 hours or up to overnight before slicing. Dust with sifted confectioner's sugar before serving. Pie may be stored in the fridge for 3-5 days.

Hoosier Mama's Hoosier Sugar Cream Pie Slice

Thanks so much to Paula and the gang at Hoosier Mama for making my visit a highlight of my Chicago Pie Tour and for welcoming me into the kitchen to roll crusts, mix fillings, and ogle the old-fashioned apple peeler. As Paula said in our chat, pie is a natural slow food--you can't eat it on the go, so it requires you to sit down, have a cup of coffee, and talk to people. A Hoosier mentality to be proud of.

Thursday, March 28, 2013

Floriole's Milk Chocolate & Salted Caramel Hazelnut Tart

Floriole Bakery, Chicago, IL

Though I'm a Midwesterner by birth, having lived in more southern climes for the past five years, I sometimes forget just how bone chillingly cold the northern winter can be. So cold, that long underwear (top and bottom), a hat, scarf, and ankle-length puffy coat are necessary attire even if you're just stepping out to the corner café for a cup of coffee. This was something I forgot once again last month, when, in my thin wool coat and no hat or long underwear to speak of, I ventured to Chicago to embark on a Windy City Pie Tour for an NPR Kitchen Window story.

It turns out, I was in luck for at least that first day of my visit. Though the temperature was soon to plummet drastically, it was pushing the high 40s when I boarded the bus to meet my friend Ryan at my first pie stop--Floriole Café and Bakery.

Coffee Counter at Floriole Bakery
Counter at Floriole Bakery
Counter at Floriole Bakery, Chicago, IL

I've been wanting to try Floriole's baked goods every since my friend Abra started working there, back when it was just a 10X10 stand at Chicago's Green City Market. Since 2010, though, its occupied a 2-level beautiful light-filled brick and mortar space in Lincoln Park and features chalkboard menus listing breakfast quiches, Lottie + Doof-inspired Rotini and Cheese, and Mushroom and Swiss Chard Sandwiches; a full espresso bar; shelves lined with house made jams, wine, and baguettes; and a pastry case stocked with the likes of Orange and Satsuma Tarts, Basque Cakes, and Raspberry-Rose Panna Cotta. As head chef and owner Sandra Holl says, the Floriole approach is "pretty simple baked goods and pastries, made with the best fresh, seasonal ingredients." While "simple" may be selling herself a bit short, particularly for a home baker like me, in awe of her creations, I understand what she means. In each pastry or savory dish, excellent ingredients are the highlight, and they're presented with real care and without pretension.

Lemon, Passionfruit, and Orange Cream & Satsuma Tarts at Floriole
Floriole's Milk Chocolate and Hazelnut Tart
Passionfruit Tart at Floriole

Abra who now runs the savory program, was in the kitchen prepping sandwiches when Ryan and I arrived. She gave us a little tour of the kitchen, and presented us with a large plate of three Milk Chocolate Caramel & Hazelnut Tarts to photograph (and oh yes, sample) for the pie tour story. With our little table by the door filled with the tarts, two sandwiches, a slice of quiche and a Passionfruit Tart and Basque Cake that Abra brought for us to try, we felt like total gourmands. What the other customers walking in the door must have thought! But we weren't complaining.

Lunch at Floriole

Of the savory selections we tried, my hands-down favorite was the B.A.D., a bacon, arugula, almond-date spread and goat cheese sandwich on a yeasted corn bread. I'm gonna have to try to replicate that at home so I can satisfy my cravings between my infrequent Chicago visits. As for the pastries, though it was hard to decide. The Passionfruit Tart was just-tart and light and sweet with a few pomegranate seeds sprinkled on top--good for the morning hour. But the Milk Chocolate & Salted Caramel Hazelnut Tart! Just so rich and decadent, though a nice pairing of sweet milk chocolate and slightly bitter dark caramel. Sandra calls it an "adult candy bar," and recommends eating it with a cup of black coffee or Earl Grey tea. Luckily, she shared the recipe so you don't have to immediately jet to Chicago and brave the Windy City cold to try a bite.

Floriole's Milk Chocolate & Salted Caramel Hazelnut Tart

Milk Chocolate & Salted Caramel Hazelnut Tart

Makes one 10-inch tart or five 4-inch tarts

Ingredients
For sablé (or short crust) dough:
8 ounces (2 sticks) soft butter
3/4 cup sugar
1/4 teaspoon salt
2 large eggs, at room temperature
3 1/4 cups all-purpose flour

For milk chocolate ganache filling:
1 1/2 cups cream
14 ounces chopped milk chocolate

For salted dark caramel/hazelnut topping:
1 cup sugar
1/4 cup water
1 teaspoon salt
1 teaspoon corn syrup
1/2 cup heavy cream
½ cup hazelnuts, toasted and chopped

Directions
For the dough:
1. In the bowl of a stand mixer fitted with the paddle attachment, combine butter, sugar and salt. Mix until well combined and the mixture just begins to lighten.

2. Add the eggs one at a time. Allow each egg to be fully incorporated before adding the next. Add all of the flour at once. Mix on low speed until homogenous.

3. Form the dough into a ball, then pat it out into a disc. Wrap in plastic wrap and chill for at least three hours or overnight.

4. Preheat oven to 350 degrees. On a lightly floured surface, roll the dough out into a 12-inch circle about ¼-inch thick. Place the dough into a 10-inch removable bottom tart pan. Press the dough into the corners and remove excess dough. Chill about 15 minutes before baking.

5. Bake for 20-30 minutes, or until golden brown. If the dough bubbles while baking, lightly press it down with a measuring cup. Let cool to room temperature.

For the ganache:
1. Place cream in a small saucepan on low heat, and bring to a simmer. Put chocolate in heat-proof bowl. Once the cream is simmering, pour over the chopped chocolate and let sit 5 minutes. Stir
until homogenous.

2. Pour the ganache into the prepared shell and let set at room temperature. This will take
about four hours.

To make the caramel and hazelnut topping:
1. Combine all ingredients except the cream in a deep heavy-bottomed saucepan. Bring to boil and cook until the color begins to change. At this point, begin to stir the mixture slowly with a whisk. It will first begin to smoke from the sides. Once it begins to smoke from the center and is a deep amber color slowly add the cream and stir. Be very careful because the mixture will bubble up and can cause terrible burns.

2. Let the caramel cool. It should still be warm but not hot when you pour it over the top of the chocolate. Top the tart with chopped and toasted hazelnuts. Serve at room temperature.

Floriole's Milk Chocolate & Salted Caramel Hazelnut Tart
Thanks so much to Sandra, Kerry, and Abra for arranging the visit and interview, and for hosting us the day of. I'm looking forward to making it back to Floriole, perhaps in the heat of summer. In the meantime, I'll let you know how my B.A.D. experiments go and more dispatches from my Chicago pie tour coming soon...

Related recipe:
Dark Chocolate & Salted Caramel Pie

This post was featured on Relish Magazine's "Blogs We Love". Thanks, Relish!

Thursday, March 07, 2013

Bakewell Tart with Apple Rosemary Jelly

Bakewell Tart with Apple Rosemary Jelly
Forever interested in how I can combine my preserve-making with baking, I've long had my eye on the Bakewell Tart. I was reminded of it recently, on my visit to Pleasant House Bakery, a British-inspired pie shop in Chicago which features it on their sweet menu, right next to banoffee pie (another one to try soon) and various seasonal trifles.

The name for the tart comes from the village of Bakewell in Derbyshire, England, and like the best classic desserts, there seems to be a bit of lore surrounding it. The first recipe for this shortcrust pastry tart with a bottom layer of jam and a frangipane top layer appeared in 1845, but was apparently not given the moniker "Bakewell" until the 20th century. Legend goes though, that it was invented in the mid-1800s by a baker in the town, who by mistake put the layer of jam on the bottom instead of the top, where it was intended to go. There are also Bakewell puddings, similar confections, but with a flaky crust rather than a short crust.

Bakewell Tart with Apple Rosemary Jelly

For my version, I used an apple-rosemary jelly that I had made last fall and needed to use up. I adapted the frangipane filling recipe from Smitten Kitchen's version, and tried out the sablé crust recipe from another Chicago bakery, Floriole, straying from my usual Dorie Greenspan recipe. I love this one though-- it comes together easily (you can use your mixer!) and is a little lighter and more shortbread biscuit-like than Greenspan's. I'll still use hers for other recipes, no doubt, but Floriole's is just perfect here.

Apple Rosemary Jelly

Apple Rosemary Jelly
From The River Cottage Preserves Handbook

Makes 4-5 8-oz. jars

Ingredients
3 lbs., 6 oz. cooking apples
1 medium bunch of rosemary
7 Tblsp. apple cider vinegar
Granulated sugar

Directions
1. Coarsely chop the apples, but no need to peel or core them. Place them in a preserving pan with rosemary, reserving 6 small sprigs to put into jars. Barely cover the apples with water, and bring to a boil. Once boiling, reduce heat and let simmer, 45 minutes-1 hour, until the apples are quite soft.

2. Pour the contents of the pan into a jelly strainer bag (I used cheesecloth) suspended over a large bowl, and let drip for at least 2 hours, or overnight.

3. Measure the strained apple-rosemary juice. For every cup of juice, measure 1 c. sugar into a bowl and set aside. Return the juice to the cleaned-out pan and add apple-cider vinegar. Heat the liquid to a boil, then add the sugar, stirring until dissolved. Increase the heat to high and boil rapidly for 10 minutes until the setting point is reached, or liquid reaches a temperature of 220 degrees F. Remove pan from heat and skim top with a slotted spoon to remove any scum.

4. Pour jelly into warm, sterilized jars, adding a rosemary sprig to each. Cover jars and seal (make sure to follow proper canning methods--the FDA is a good resource) and use within 1 year.
Bakewell Tart with Apple Rosemary Jelly

Bakewell Tart
Crust from Floriole, Filling adapted from Smitten Kitchen

Makes 1, 11-inch tart

Ingredients
For the sablé crust:
8 oz. (2 sticks) soft butter
3/4 c. sugar
1/4 tsp. salt
2 large eggs
3 1/4 c. all-purpose flour

For the filling:
1 c. coarsely chopped and blanched almonds
1 1/2 Tblsp. all-purpose flour
2/3 c. sugar
9 tablespoons (1 stick + 1 tablespoon) unsalted butter, room temperature
1 large egg
1 large egg white
1/2 tsp. almond extract
1 1/2 teaspoons lemon zest
 1/2 c. apple rosemary jam (or jam of your choice)
Slivered or sliced almonds, for garnish (optional)

Directions
For the sable crust:
1. In the bowl of a stand mixer fitted with the paddle attachment, combine butter, sugar and salt. Mix until well combined and the mixture just begins to lighten. Add eggs the eggs one at a time, allowing each egg to fully incorporate before adding the next. Add the flour all at once and mix on low speed until homogenous.

2. Form dough into a ball and pat it out into a disc. Wrap with plastic and chill-- Sandra recommends at least three hours or overnight, but I chilled mine for about 2 and it did the trick.

3. Preheat oven to 350 degrees F. On a lightly floured surface, roll dough out into a 12-inch circle about 1/4-inch thick. Place the dough into the 11-inch removable bottom tart pan. Press the dough into the corners and remove excess dough. Prick the bottom of the crust all over with a fork and chill while you prepare the filling (at least 15 minutes). 

For the filling:
1. In a food processor, finely grind almonds and flour. Mix in the sugar, then the butter, extract, and lemon zest, blending until smooth. Add the egg and egg white and mix until incorporated. Transfer the filling to medium bowl. Cover and chill at least 3 hours (I was pressed for time so did about 1.5 hours and it was fine). 

2. Preheat oven to 350° F. Spread jam over the base of tart shell. Dollop the almond filling all over the jam, then spread it carefully with an offset spatula. If you're using slivered or sliced almonds as garnish, sprinkle them over the top now. 

3. Bake the tart until golden and a toothpick or fork inserted into the center of the filling comes out clean, approximately 45 minutes. Cool the tart in pan on rack.

4. To serve, push the pan bottom up, releasing tart from pan. Sprinkle with powdered sugar, if desired and serve warm or at room temperature, with tea.

Bakewell Tart with Apple Rosemary Jelly Slice

I set out the tart on an old-timey brew and nosh bar we set up in the living room as an "opening act" to a house concert by my friends Anna Roberts-Gevalt and Elizabeth LaPrelle aka Anna + Elizabeth. There were homemade cordials, infusions, and brews; tarts, citrus poppyseed cake, and spiced nuts; and British ballads, Appalachian fiddle tunes, and original cranky shows.

Related recipe:
Almond and Grapefruit-Ginger Marmalade Crostata

Saturday, September 10, 2011

Peach Apricot Raspberry Wedding Pie

My good friends Erik and Abra got married two weekends ago at Bare Knuckle Farm (where Abra is a business partner/farmer) in Northport, MI. The weather was *perfect* (despite the fact that much of the east coast was being hit by Hurricane Irene), old pals were there in force (making for a killer dance party later), and the food, oh, the food!


Abra is a chef in Chicago, and she enlisted her Chicago chef pals to each contribute a dish, for a local farm fancy wedding potluck, of sorts.


Two of the bakers Abra works with are Paula Haney and Kelsey Coday of Hoosier Mama Pie Company. They contributed the most delicious Peach Apricot Raspberry pies which stood alongside cakes by Sandra Holl and Meghan Stone at Floriole Bakery.


I can't speak much about the pie, honestly, because I ate it in sporadic bites while trying to prep for DJing, and don't remember specificities of taste, just that it was so fresh and DELICIOUS.

Congratulations and thank you to Abra & Erik (as well as to everyone who contributed) for this quite perfect celebration. May there be many delicious pies in your future! xoxo.

Sunday, June 19, 2011

Strawberry Pie

With the farmer's markets overflowing with fresh, juicy strawberries, I couldn't resist the urge to buy a few pints and make a strawberry pie.


My last attempt at a strawberry pie was last summer. I was making the pie for a party and left it in the refrigerator to chill as guests arrived. When I went to take it out a few hours later, a piece had been cut out (a pie bandit!) and the filling had spilled into the space. Though delicious, the pie had not set very well, but I never knew if the recipe or the pie bandit was to blame.


This year, I used a slightly different recipe and kept friends far from the fridge as the pie chilled. And guess what? It set! And it was bursting with fresh strawberry flavor.


Strawberry Pie


Ingredients:

1 9-inch pie crust, baked

2 pounds fresh strawberries, rinsed and hulled

1/2 cup granulated sugar

2 1/2 teaspoons cornstarch

1 1/2 teaspoons lemon juice, freshly squeezed

1/8 teaspoon salt

1 envelope unflavored powdered gelatin

2 tablespoons cold water


Slice about 3 cups of the strawberries into quarters. Either crush the berries with a fork or process in a food processor until mushy. You should have about 1 1/2 cups crushed berries. Place the crushed berries in a saucepan over medium heat with the sugar, cornstarch, lemon juice and salt and stir to combine. Bring to a simmer, stirring occasionally until the mixture begins to thicken slightly, about 5-7 minutes.


While the mixture is cooking, soften the gelatin in the cold water and set aside.


Remove berry mixture from the heat, add the softened gelatin and stir until the gelatin has dissolved. Set aside to cool to almost room temperature.


With the remaining berries, set aside the most attractive ones and slice in half (these will go decoratively on the top of the pie). Cut the rest into quarters and fold them into the cooled mixture. Pour this mixture into the baked pie shell then arrange the halved berries on top. Chill in the refrigerator until set, at least 2 hours or overnight before serving.


Adapted from: Sing For Your Supper


Wednesday, March 23, 2011

Friends of Hoosier Mama


Hoosier Mama Pie Company in Chicago, where our friend Abra works and where Heather and I stopped in for a visit on New Years Day 2010, listed us as a friend/"pie fanatic" on their website, and tweeted about us. Sweetness!

Chicagoans and Chicago visitors, don't miss Hoosier Mama for a delicious (not to mention massive) slice of fresh pie and cup of coffee in this adorable little West Town pie shop.

Sunday, January 02, 2011

Damn Fine Pie


Heather got me this print from Chicago's Slow Industries for Christmas. Smiling coffee and cherry pie-- damn fine!

Monday, January 18, 2010

Hoosier Mama Pie Company

As stated below, on New Year's Day, Heather and I braved the Chicago cold to make a pilgrimage to Hoosier Mama Pie Company, in West Town. Hoosier Mama is an adorably tiny pie shop, with a whole lotta pie, and a pie philosophy that really resonates with my own-- local culture, tradition, history, whole foods, women's domestic arts (see video below for more on this), as well as Hoosier pride.
The pie-makers there were all incredibly friendly (especially when we told them we were friends with Abra, who works there occasionally) and let me ogle and photograph their tin top tables and pie paraphernalia...


We even got to meet the Hoosier Mama herself (stirring on the left).

It took Heather and me a long time to figure out which 2 pies to try--Hoosier Sugar Cream & Pear Apple Cranberry? Maple Pecan & Lemon Chess?

We settled on Banana Cream & Key Lime...
via the "$5 sweet slice + coffee for here!", and took our treats to the built-in booth in the bay window.


The key lime was our favorite--zesty and delicious with an excellent graham-cracker crust. The banana cream, which was topped with white chocolate shavings, was good, albeit extremely rich. This slice had their standard crust, which was decent, though a little tough and not as flaky as it could be. Before seeing the video below, I would have guessed that they used at least 1/2 shortening and 1/2 butter. Nonetheless, we firmly entered the Pie Enjoyment Zone...
 
and browsed their awesome collection of old pie cookbooks, The Farm Journal's Complete Pie Cookbook, being my favorite.

MAN APPEAL?!
And though I'm not necessarily the type of girl to fantasize about my wedding day, this framed photo did get my mind a-reeling...

As you can see, Hoosier Mama is basically THE Pie Enjoyment Zone, and hopefully our New Year's visit will bring us in good pie for 2010.

Cranberry Chess Pie

Fig Pistachio Tarte Tatin

Peppermint Pattie Tart

Whiskey & Dark Chocolate Bundt Cake

Blog Archive