Wednesday, December 23, 2015
Christmas Pie Ideas
My trip home for Christmas has been delayed by a pesky migraine, but the upshot is that this extra recovery time offers me chance to squeeze in a little post before the holiday. Things have been busy for me, with a new city and job and all, and I realize my previous post was of a similar bent, just for Thanksgiving, but I'm looking forward to digging back in to some regular posts in the new year. In the meantime, enjoy your winter holiday celebrations, whatever they may be, and hope there's some sweetness to go with it.
Chocolate
Chocolate Orange Pie with Mascarpone Cream
Chocolate Peanut Butter Pie with Nabs Crust, pictured top left
Milk Chocolate & Salted Caramel Hazelnut Tart
Peppermint Pattie Tart
Fruit & Nut
Bourbon Ginger Pecan Pie
Cranberry Pie, pictured bottom right
Fig-Pistachio Tarte Tatin
Shaker Orange Tarts
Preserves & Icebox
Almond & Grapefruit-Ginger Marmalade Crostata
Bakewell Tart with Apple Rosemary Jelly, pictured bottom left
Meyer Lemon Honey Marmalade Linzer Torte
Speculoos Icebox Pie
Cookies & Cakes
Pea & Corn Cookies
Sandy Spring Sand Tarts, pictured top right
Whiskey-Soaked Dark Chocolate Bundt Cake
Savory
Corn and Black Pepper Crackers
Ham, Gruyère & Caramelized Onion Galette with Fried Egg
Red & Golden Beet & Goat Cheese Tart
Tri-color Potato, Caramelized Onion, Goat Cheese & Rosemary Galette
As always, you can find many more recipes, via the Recipe Index.
Monday, November 16, 2015
Thanksgiving Pie Ideas
This is the first time in ten years I'll have spent Thanksgiving with my family. This past decade of Friendsgivings, celebrated from Maine to Maryland, have always been a rowdy delight and have taught me about how to do holidays at the grown-ups table right-- I hope there are many more in store. But this year I'm looking forward to spending the day at home in Indiana. In the past few years, my family has become particularly fond of Hoosier Mama's Cranberry Chess Pie, so I expect to fulfill a request for one of those, but I'll also likely venture in to new territory-- a Pumpkin-Pecan Pie, Aurora Tart, or Apple Cider Cheesecake, perhaps? If you're also still deciding, here are a few suggestions for your Thanksgiving table-- both savory and sweet. If you don't find quite what you're looking for, check out the Recipe Index, as well as past guides from 2014, 2013, and 2012.
Pumpkin, Squash & Sweet Potato
Delicata Squash Pie (pictured, top right)
Drunken Pumpkin Bourbon Pie with Mascarpone Cream
Pumpkin & Chai Spice Nut Butter Pie
Sweet Potato Pie with Cornmeal Crust
Sweet Potato Speculoos Pie
Fall Fruits
Apple Pie with Salted Caramel Glaze
Cranberry Chess Pie
Cranberry Pie
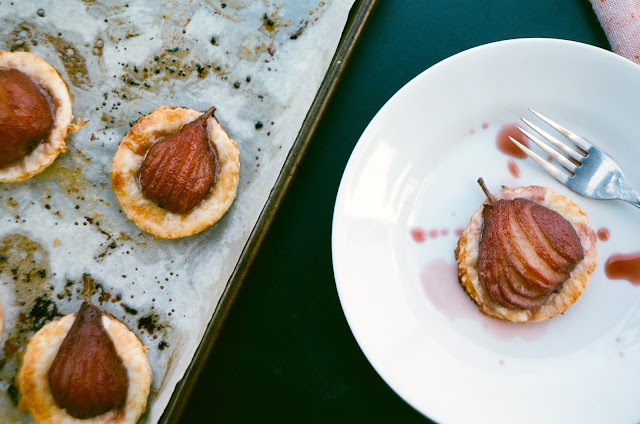
Red Wine-Poached Seckel Pear Tartlets (pictured, top left)
Persimmon Pie
Chocolate & Nuts
Bittersweet Chocolate Pecan Pie
Bourbon Ginger Pecan Pie
Chocolate Chess Pie
Cranberry Chocolate Chess Pie (pictured, bottom left)
Pine Nut & Honey Tart
Custard & Cheese
Cranberry Goat Cheese Tart with Almond Shortbread Crust
Kentucky Lemon Chess Pie
Maple Bourbon Buttermilk Pie with Apple Syrup
Pumpkin-Ginger Cheesecake Pie
Salty Honey Pie
Savory
Celery Ham Tart aka Pissaladière
Gordy's Cherry Pepper Spread Galette
Pear, Gruyere & Caramelized Onion Hand Pies
Puff Pastry Hand Pies with Goat Cheese & Hot Pepper Jelly (pictured, bottom right)
Swiss Chard & Goat Cheese Galette
And whether from this list or not, I'd love to hear what you'll be making this Thanksgiving-- I may even have to borrow your idea.
Saturday, October 24, 2015
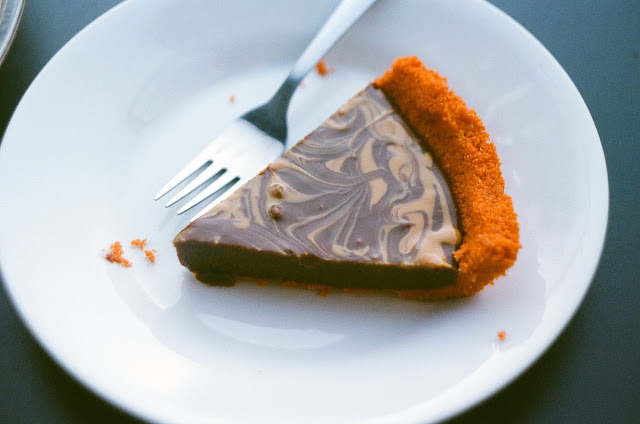
Chocolate Peanut Butter Pie with Nabs Crust

Nabs. Peanut Butter Crackers. Lance's Toast Chee. Whatever you call them, you are likely familiar with the unnaturally florescent "cheese" crackers that are sandwiched with peanut butter and wrapped in cellophane-- six to a pack. For me, they were the stuff of after school snacks, bought with quarters out of the teacher's lounge vending machine or pulled from my mother's desk drawer while my brother and I waited for her to finish her classroom work. I hadn't thought about those sandwich crackers much since until my friend Emily Wallace, a Nabs devotée, made some illustrations of them for bookmarks. Then a few months ago, while interviewing Richmond chef Travis Milton for a story for Gravy, he mentioned that he'd made some Nabs-crusted pork cutlets and began to wax poetic:
It’s kinda like a fried pork chop pounded up and you just grind up Nabs and the sugar and the peanut butter gets real real crispy and kinda caramelizes and the cracker meal gets good. I’ve also rolled sausage balls or boudin balls in that too. Nabs are one of my favorite things in the world.

This got me thinking-- could I use Nabs in a sweet dish, perhaps as a pie crust? I started talking about it with some friends, but quickly realized that many did not know what "Nabs" were, calling them instead "Toast Chee" or "Cheese and Peanut Butter Crackers." "Nabs" are a shortened version of "Nabisco," who along with Lance, produced varieties of the sandwich crackers in the early 1900s. Nabisco adopted the shortened name used by customers, however in the late 70s and early 80s, they discontinued their "Nabs," leaving those made by Keebler and Lance to become the prominent brands. The "Nabs" moniker is particularly prevalent in North Carolina, as according to Our State Magazine, both Lance and Nabisco had factories in the state, and the crackers were a common quick snack for mill workers who often did not get a break for lunch.

Regardless of what you call them, my rigorous testing proved that Nabs can indeed make a fine pie crust, similar to a graham cracker, saltine, or Oreo crust. I adapted the filling from this Peanut Butter-Pretzel Tart, as Nabs seemed to demand a milk chocolate pairing rather than semi-sweet. The result resembles a Butterfinger, both in richness and flavor. Rather than a peanut butter swirl, you could also do a chocolate covered peanut filling, which would add a nice crunch.
For the crust:
1 1/2 cups (about 6 packets) Nabs aka "Cheese" and Peanut Butter Crackers, crushed
4 Tablespoons unsalted butter
1 Tablespoon granulated sugar
1/4 teaspoon salt
For the filling:
8 ounces milk chocolate chips
3/4 cup heavy cream
2 Tablespoons unsalted butter
1/2 cup smooth peanut butter (Use run-of-the-mill salted and sweetened peanut butter. If you use natural, make sure it's smooth, and you'll want to add sugar to taste--probably 1/2 cup)
Directions
1. For the crust: Preheat oven to 350 degrees F. Place Nabs in the bowl of a food processor and process until fine crumbs form. Add melted butter, sugar, and salt, and pulse until well mixed.
2. Pat the buttery crumbs into a 9-inch pie pan, pressing mixture into the bottom and sides to form a pie crust. Place in oven and bake until crust is set, about 10-12 minutes. Place on a cooling rack and let cool to room temperature before adding the filling.
3. For the filling: Put chocolate in a heat-proof bowl and set aside. Combine cream and butter in a medium saucepan and place on medium heat until it just comes to a boil. When it begins to boil, pour it over the chocolate, cover the bowl, and let it sit for 3-5 minutes. Remove the lid and whisk in the chocolate until it is completely melted and has a ganache-like consistency. Pour it into the cooled pie crust and smooth with a rubber spatula.
4. Meanwhile, warm the peanut butter in the microwave or on the stove until it is slightly runny. Pour it over the chocolate ganache, and drag a butter knife through it to create swirls. Chill for at least 25-30 minutes to set. Serve at room temperature and enjoy.
Related recipes:
Chocolate and Peanut Butter Pretzel Tart
Chocolate and Strawberry Pocky Pie
Peanut Butter Banana Cream Pie with Chocolate Ganache
Speculoos Icebox Pie
Monday, October 12, 2015
Delicata Squash Pie
Since the very early days of this blog, I've asserted that if you're going to make a "pumpkin" pie from scratch with purée from a fresh vegetable, you should make it with squash, not pumpkin. Not only is the flavor generally better-- sweeter and more potent-- the consistency is much preferable-- less watery and less stringy than a pie pumpkin. My favorite squash to use is delicata. The long tubular gourd that's striped dark green and cream, indicates its taste via its name, which means "sweet". Delicatas can be harder to find than butternut or acorn squash (unless you live in Vermont, where they seem to be everywhere), but the quest is well worth it for the resulting pie.
This recipe, which I first made for a Burlington, Vermont "Seamonster Potluck" in 2006, was one of the four from Nothing in the House selected by King Arthur Flour to appear in their fall issue of Sift, alongside my article on the anthropology of pie. It's fitting, particularly as I'm not sure I'd had a delicata until I moved to Burlington, where my friend Andrea cut thin coins of them, topped them with masked celeriac, roasted them, and called it a "delicata cookie"-- one of my favorite savory treats to this day.
Here's the recipe that appeared in Sift, adapted from my original. King Arthur's lovely cream swirl didn't quite work out for me, so instead I whipped some extra cream just slightly, and drizzled it atop the baked and cooled pie.

Delicata Squash Pie
Ingredients
Nothing in the House pie crust, halved
1 1/2 cups evaporated milk or cream
1/4 cup brown sugar
1/2 cup granulated sugar
1 teaspoon cinnamon
1/2 teaspoon ginger
1/4 teaspoon nutmeg
1/8 teaspoon cloves
1/2 teaspoon salt
2 large eggs, beaten
3 medium (1 3/4 pounds before cooking) delicata squash
Additional evaporated milk or cream, for swirling
Directions
1. Prepare half of Nothing in the House pie crust as per the directions, reserving the leftover egg for an egg wash. Chill dough at least one hour before rolling and fitting into a greased and floured 9-inch pie pan. Let chill in the fridge while you prepare the filling. Meanwhile, preheat oven to 350 degrees F.
2. Halve the squash lengthwise, and use a spoon to scoop out the seeds. Bake, cut side down, in a 9 x 13-inch pan with 1/2 inch of water in the bottom. After 30-40 minutes, press the squash with your finger; when it's soft, it's done. Remove from the oven, and when cool enough to handle, scoop out 2 cups of the flesh. Purée until smooth. Increase the oven's temperature to 425 F.
3. For the filling: Combine the evaporated milk or cream, sugars, spices, salt, and eggs. Add to the squash and blend until smooth with a hand mixer or immersion blender. Pour the filling into the prepared pie shell. Add a swirl of cream or evaporated milk on top, or sprinkle with cinnamon for decoration, if desired (you could also drizzle with cream and/or sprinkle with cinnamon post-baking).
4. Placed the pie on a baking sheet, and bake for 15 minutes at 425°F. Reduce the temperature to 350 F and bake for another 40 to 45 minutes, until the pie is mostly set, and a 1-2 inch circle in the center still wobbles a bit when you nudge the pan. Remove the pie from the oven and cool it completely before slicing. Sprinkle with cinnamon and/or drizzle with whipped cream, if desired.
Related recipes:
Drunken Pumpkin Bourbon Pie with Mascarpone Cream
Pumpkin & Chai Spice Nut Butter Pie
Pumpkin Ginger Cheesecake Pie
Saturday, October 10, 2015
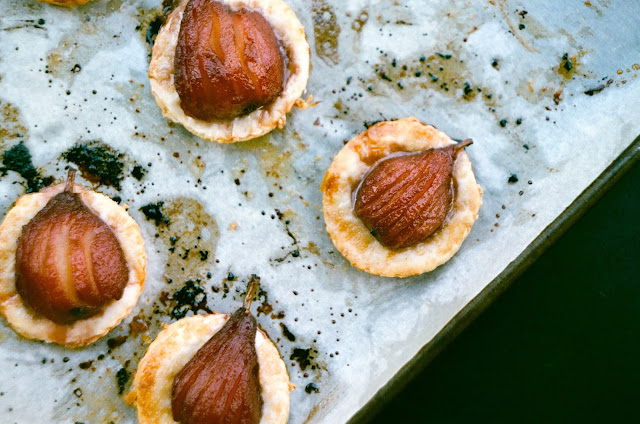
Red Wine-Poached Seckel Pear Tartlets
A few weeks ago, I attended an American Folklife Center symposium at the Library of Congress, celebrating the release of the new book Ola Belle Reed and Southern Mountain Music on the Mason Dixon Line by fellow folklorists Henry Glassie, Cliff Murphy, and Doug Peach. The book, which I highly recommend, is based on fieldwork by Glassie and Murphy and relates the story of a group of southern musical families who moved to Delaware, Maryland, and Pennsylvania in search of jobs during the Great Depression. Placing Ola Belle and her relatives and descendants at the center, it examines the community of southern traditional music that took hold there and its modern iterations, namely in the music of Danny Paisley and the Southern Grass, and Zane and Hugh Campbell.
As a big fan of Ola Belle, Hugh, and Zane, as well as the book's authors, the symposium a lovely and insightful gathering. My one critique is that I wish there had been more women's voices on the stage. Upon talking about this with my coworker Greg, he suggested I get in touch with Judy Marti, a banjo player, orchardist and last student of Ola Belle's, who also self-published a biography of her that's often quoted in the new book. I emailed Judy and said I was interested in meeting her, learning about her music and farming, and possibly playing some tunes, and she invited my bandmate Nadia and me up to her orchard in Biglersville, PA on a Saturday afternoon.

I wanted to make something to bring to Judy and her husband, and figuring they already had a glut of apples, my eye turned to the quart of Seckel pears I'd bought at the farmers' market the weekend prior. I don't believe I'd baked with them before, and felt they were so remarkable in their size and flavor, that I wanted to preserve and showcase that as much as possible. I remembered seeing a beautiful wine-poached pear recipe on David Lebovitz's blog and figured I could poach these mini pears whole and place them on individual tarts. I found a similar recipe via The Telegraph, and baked these Saturday morning after poaching the pears the night before.
As usual, I was in a rush to finish baking before I head to drive up to Biglersville, but I made it out in time, and it was the perfect crisp and sunny fall day for a trip out of the city. When Nadia and I arrived, Judy took us for a tour of her orchard, which she called a "homestead farm," mostly supplying just enough for her and her family, plus some barter and sales. Then we sat on the deck of her sauna, and she showed us Ola Belle's distinctive picking technique, told us stories about their friendship, and we passed instruments around, sharing tunes with each other.
In the end, I felt a little silly bringing pear tarts to an orchard (that it turns out, also grows pears), but after I left, Judy sent me an email, saying they were "quite good." The tartlets would also do well paired with creme fraiche and could even be brought to the savory side of things with some thyme and goat cheese spread on the puff pastry prior to adding the poached pear. You can make it with store-bought puff pastry or homemade-- Food52 has a great and fairly easy recipe. Either way, the tartlets would be wonderful as appetizers or dessert, for fall dinners or a fancy Thanksgiving feast.

Red Wine-Poached Seckel Pear Tartlets
Adapted from The TelegraphIngredients
1 dozen seckel pears
1 1/4 cup water
1 1/4 cup Merlot (or another fruity red wine)
3/4 cup brown sugar
2 broad strips lemon rind, pith removed
1 cinnamon stick
8 black peppercorns
11 ounces puff pastry (store-bought or homemade-- recipe here)
1/4 cup butter, melted
Turbinado sugar for dusting
Directions
1. Pour water and wine into a stock pot or saucepan large enough to hold all pears and whisk together with brown sugar. Hit on low, stirring occasionally until sugar dissolves. Add lemon rind, cinnamon stick and peppercorns and let simmer on very low-- do not let boil.
2. Meanwhile, peel pears without removing the stalks and place in the saucepan with the wine mixture. Bring liquid just to a boil, then reduce heat to a vert low simmer-- you want the fruit to cook slowly. Gently cook pears, turning them occasionally so every side comes into contact with the wine. They should be tender, but still hold together. Once tender, remove pan from heat and let cool. When at room temperature, transfer wine mixture and pears to a bowl, cover, and let sit in the refrigerator for 1-3 hours. This will allow the pears to absorb both color and flavor.
3. Preheat oven to 450 degrees F. Remove pears with a slotted spoon and place on a cutting board. Return wine mixture to pot or saucepan and boil until thick and syrupy. Remove from heat and let cool.
4. With a sharp chef's knife, make lengthwise cuts in pears, about 1 cm apart so slices can fan out slightly.
5. On a lightly floured surface, roll out puff pastry and cut into rounds with a biscuit cutter or glass just slightly larger than the pears. Place on parchment-lined baking sheet. Brush each pastry round with melted butter, then place pear in the center of each round. Sprinkle with Turbinado sugar.
6. Bake at 450 for 8-10 minutes until pastry is puffed and golden. Serve tartlets individually with wine syrup drizzled atop.

Related recipes:
Pear and Cardamom Fig Pie
Pear, Gruyère, and Caramelized Onion Hand Pies
Pear Tarte Tatin
Quince Biscuit Pie
Sunday, September 20, 2015
Fresh Wild Maine Blueberry Pie
I've been paying annual visits to my friends Nathan and Clara and their little ones on their farm in Brooklin, Maine since 2008. But I've always visited in the spring or early summer, when the wild blueberries are blooming, but not yet ripe. This year, though, I made my yearly pilgrimage in early September, in what I discovered to be the most glorious season in Maine, with sunny days, perfect temperatures, and the wild blueberries, huckleberries, raspberries, blackberries, and cranberries all ripe for the picking. Even the early apples were ready to be pressed into cider.
One afternoon, we walked out to their blueberry fields with rakes and pails and Nathan taught us how to harvest the berries by running a hand-held rake through the shrubs. The wild lowbush blueberries, vaccinium angustifolium, that are native to Maine and other northern regions of the United States, were a staple of the Native American diet in those regions. According to the Oxford Companion to Food, native peoples ate the berries fresh or sun-dried them to be used in puddings or cakes or ground them into meal to flavor meats and soups. New England colonists called the berries "hurtleberries" or "whortleberries"-- if you come across a period recipe that calls for them, you now know what it's referring to.
The more widespread highbush blueberry was not cultivated until the early 1900s and is generally a combination of highbush, "rabbit-eye," and lowbush varieties. Low-bush berries can be about four times smaller than their domesticated highbush counterparts and lack the tartness, instead packing a sweet, potent punch. Because of this, they are ideal to be enjoyed just fresh as is-- and by the handful.
After we raked several bushels, we lugged our full pails back down to the barn, where Nathan put them through the winnower-- a sort of steampunk contraption composed of various belts and gears, designed to separate the stems and sticks that collect with the berries while raking.
Clara and Nathan like to make this Fresh Blueberry Pie, layering a quick jam with fresh berries on top, in a baked pie crust topped generously with whipped cream. Their recipe offers the best of both worlds-- cooked and fresh berries, and aside from the pie crust preparation, it comes together quickly, so you can get to eating faster. It would be suitable for any type of berry-- huckleberries, blackberries, raspberries, or maybe a combination for a "Maine in September Fresh Berry Pie."
From Clara & Nathan of Stoneset Farm
Ingredients
Nothing in the House pie crust recipe, halved
1 quart fresh low-bush blueberries (can also use high-bush blueberries or any kind of berry, really)
1/2 cup white sugar
1 Tablespoon cornstarch
Juice of 1/2 lemon
1/2 teaspoon nutmeg
1/4 teaspoon ground ginger
Turbinado sugar, for dusting
Whipped cream
Directions
1. Prepare half of Nothing in the House pie crust as per the directions, reserving the leftover egg for an egg wash and saving other half of the recipe in the freezer for a future pie. Chill dough at least one hour before rolling and fitting into a greased and floured 9-inch pie pan. Prick crust with fork all over the bottom. Place pie pan in the freezer for 1 hour to set before baking. Meanwhile, preheat oven to 350 degrees F.
2. Remove crust from freezer, line with parchment paper and fill with pie weights or dried beans. Blind bake crust for 20 minutes. After 20 minutes, remove paper and weights, brush with egg wash and dust with Turbinado sugar. Return crust to oven and bake for 5-8 more minutes more or until fully baked, puffed, and golden brown. Let cool while you prepare the filling.
3. In a saucepan, mash 1 1/2 cups of the berries with the sugar, cornstarch, lemon juice, and nutmeg. Bring sauce to a boil and stir until thick. You're essentially making a quick jam, so it should be about the consistency of thick sauce or heated preserves.
4. Gently stir in another 1 1/2 cups of berries until incorporated. Pour into baked pie crust and smooth. Top with remaining 1 1/2 cups of berries and chill until set, at least 1 hour. Serve, as Nathan and Clara say, with "scads of whipped cream."

Blueberry Buckle
Blueberry Hand Pies
Blueberry Icebox Pie
Blueberry Pie
Saturday, September 12, 2015
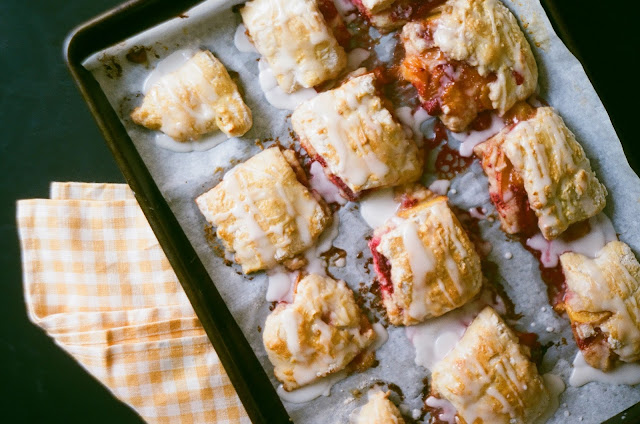
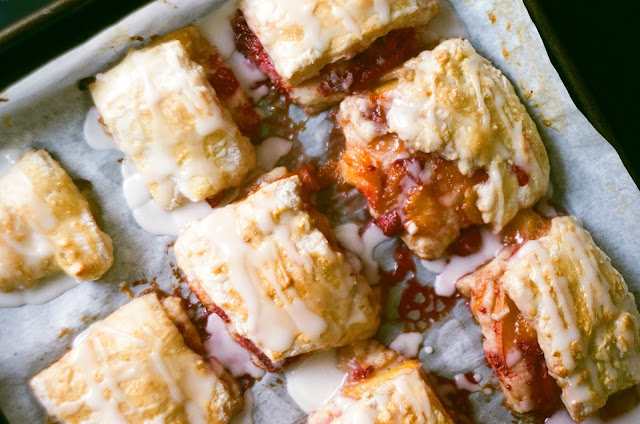
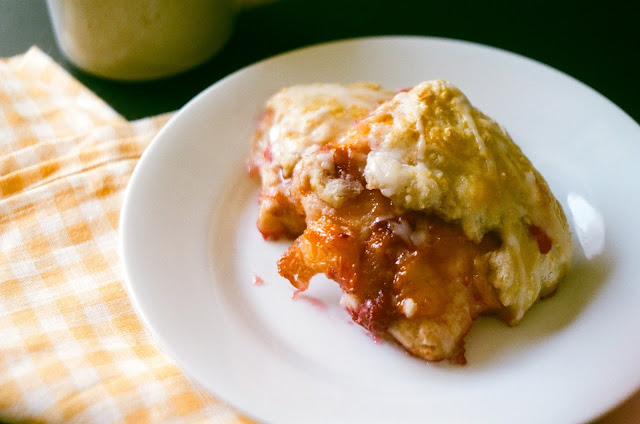
Peach & Raspberry Pie Biscuits with Lemon-Ginger Glaze
The 1828 Webster dictionary defines biscuits as "a composition of flour and butter, made and baked in private families". Though they've historically been found in home kitchens across the country in varying styles, biscuits are especially a known southern staple. According to Food Timeline and the Southern Foodways Alliance, they've been part of the daily southern meal since the mid-1700s. In some rural communities, particularly in the mountains, biscuits were associated with class, however. Professor and southern food historian Elizabeth Englehardt says that in those communities, cornbread stood in as a cheaper, quicker, and less labor intensive alternative for biscuits.

When I moved to the south, my consumption and production of biscuits probably tripled, but personally, biscuits have always had some northern ties too. Don't tell my southern friends, but my go-to biscuit recipe is actually called "Yankee Biscuits" and I got them from a New England community cookbooks via my friend Clara in Maine. True to regional taste, it contains sugar, but I leave it out unless it's for a sweet biscuit or cobbler top.
While living in Vermont and just getting in to pie baking, I was introduced to the magic of King Arthur Flour. I especially took advantage of their diversity of flours when my friends and I embarked on a month-long "eat local challenge," where as an experiment, we were limited to consuming items from the state of Vermont or within a 100-radius of where we lived.

A few weeks ago, King Arthur sent me a bag of their self-rising flour and some other goodies (including a $25 gift card-- see below) as part of their Better Biscuits Campaign. While their recipe for self-rising biscuits still bears yankee origins, it's produces fluffy, flaky golden biscuits-- all the stuff that can transcend regional differences.
I adapted theirs and Joy the Baker's recipes for these sweet Peach and Raspberry Pie Biscuits with Lemon-Ginger Glaze. They're suitable for breakfast or dessert and could easily accommodate some ice cream or whipped cream, shortcake style.
Peach & Raspberry Pie Biscuits with Lemon-Ginger Glaze
Adapted from King Arthur Flour and Joy the Baker
Ingredients
For the filling:
2 ripe peaches, sliced thin
1-1 1/2 cups fresh raspberries
2 Tablespoons unsalted butter, melted
1/4 teaspoon ground ginger
2 Tablespoons packed brown sugar
1/4 teaspoon vanilla (I used bourbon barrel-aged vanilla)
For the biscuits:
2 cups King Arthur Unbleached Self-Rising Flour
2 Tablespoons white sugar
1/4 cup unsalted butter, cold and cut into small cubes
2/3 cup cold buttermilk
For the glaze:
1/2 cup confectioner's sugar
2-2 1/2 Tablespoons whole milk
1/4 teaspoon ground ginger
Pinch salt
Directions
1. Preheat oven to 425 degrees and line a baking sheet with parchment paper. Set aside.
2. In a medium bowl, combine filling ingredients: sliced peaches, raspberries, melted butter, ginger, brown sugar, and vanilla, and stir with a wooden spoon. Set aside.
3. For the biscuits, place flour in a medium bowl and whisk in the sugar. Cut in butter cubes with a knife and fork until mixtures the texture of cornmeal and peas. You want to work this as little as possible so the butter chunks remain cold.
4. Create a well in the center of the flour mixture and pour in buttermilk. Stir the mixture together with a wooden spoon until it is moist but holds together.
5. On a clean, floured (use all-purpose flour) surface, pat biscuit dough into a rectangle about 1/2-inch thick and about the width and length of a piece of paper (8.5x11). You may opt to use a well-floured rolling pin for this instead of your hands. Spoon the filling over half of the biscuit dough, then fold the bare side over top (this will get a little messy). Press the edges and pat into a 6x8 inch rectangle.
6. Using a sharp knife, slice the dough into a dozen squares. Transfer them to the prepared baking sheet, using a spatula. Place in the middle rack of the oven and bake for 12-14 minutes until the biscuits are golden brown and puffed.
7. Meanwhile, prepare the glaze by whisking together the confectioner's sugar, milk, ginger, and salt.
8. Once biscuits are done, remove from oven and let cool at least 7-10 minutes. Drizzle with glaze and enjoy! Biscuits are best served slightly warm and eaten within 2 days of baking. They also freeze and reheat well.
I've pretty much shied away from giveaways for the entire life of this blog, but this one is a pretty sweet deal for bakers from what I consider the best widely available flour mill and baker's resource in the country. King Arthur Flour has generously offered a $25 gift card to their online store, where you can purchase their flours and other baking essentials. To enter, you can either leave a comment below or on Instagram, 1. follow @thehousepie 2. like this photo and 3. tag a friend who would also benefit from some fine baking supplies. We'll give this giveaway thing a shot.
Related recipes:
Apple-Raspberry Pandowdy
Peach-Blackberry Cobbler
Peach Blackberry Pie
Peach-Sorghum Pandowdy with Cornmeal Biscuits
Quince Biscuit Pie
Friday, September 11, 2015
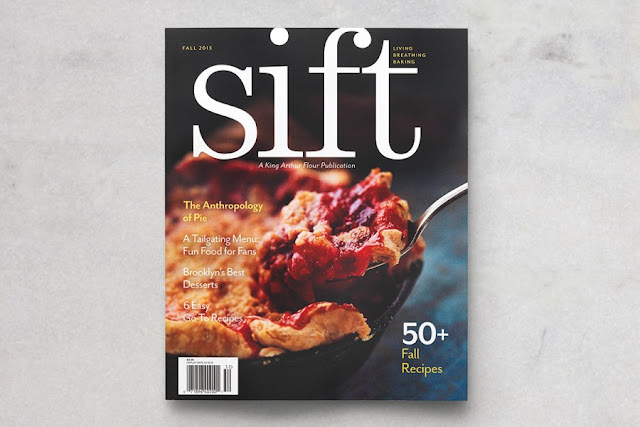
The Anthropology of Pie in Sift Magazine
Earlier this year, I was given the dream assignment of writing "The Anthropology of Pie" for the fall issue of King Arthur Flour's baking magazine Sift. As I could write chapters on the subject (and maybe some day I will), I decided to zoom in on historical moments where pie has displayed its economy, ingenuity, and scrappiness to reinvent itself in contexts both urban and rural; commercial and domestic; individual, and communal.
Sift also included four of my pie recipes (three original, one adapted from the excellent First Prize Pies by Allison Kave), all of which first appeared on the blog: Cranberry Chocolate Chess Pie, Passion Fruit Meringue Pie with Macadamia Crust, Delicata Squash Pie (from the early days!), and Bourbon Ginger Pecan Pie.
Thank you to the kind folks at King Arthur flour, especially editor Susan Reid, photographer Mark Weinberg, and stylist Erin McDowell for making my pies and words look so good. Sift is available online and in many book and grocery stores around the country.
Photos via King Arthur Flour
Friday, August 21, 2015
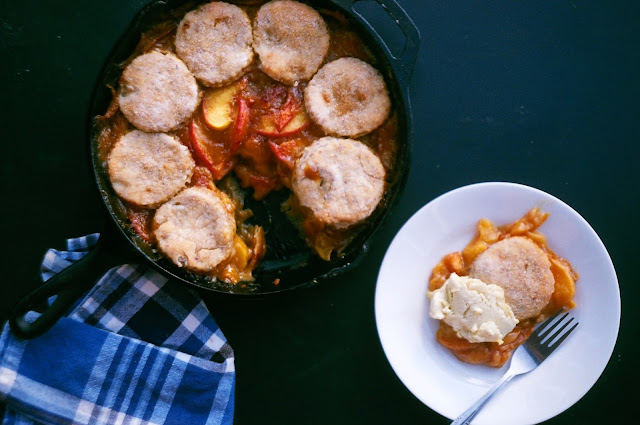
Sorghum's Savor Peach-Sorghum Pandowdy with Cornmeal Biscuits
I was first introduced to the wonderful Ronni Lundy in 2010, when she asked my friend Lora and me to contribute a piece on Pi(e) Day to her online food magazine Zenchilada (if you're not familiar with Ronni's books, editorial work, and contributions to the Southern Foodways Alliance, school yourself!). But I didn't actually meet her in person until this May, when, covered in flour, we whirled about the Jackson County, Kentucky community kitchen, jabbering and singing Dwight Yoakam songs as we made deviled eggs, sweet potato sonker, rhubarb tarts, cake, cocktails, and more for a farm party and feature in her upcoming book on Appalachian foodways.
We instantly connected-- so much so that when I realized that I'd remembered my Kitchen-Aid mixer but entirely forgot the attachments, she asked me if I was sure I wasn't her long-lost child. I learned a lot from Ronni from just those few hours in the kitchen, but she's been a teacher and inspiration ever since that first e-introduction. One of the biggest lessons I've gleaned from her is through her dedication to the sweet, complex syrup beloved in the Appalachian South-- sorghum.
Ronni champions the ingredient in many forums, but she published a book on the stuff, Sorghum's Savor, earlier this year. It's part reference-part cookbook, with personal essays and historical background, testimonies from chefs and favorite folk musicians (Jean Ritchie, namely) and recipes from Ronni and other notables like Edward Lee, Travis Milton, Nancie McDermott, Sean Brock, John Fleer, and Anna Bogle. It's full of information and wit and appetite-inspiring recipes-- the type of cookbook that you want to read cover to cover.
If I lost you on "sorghum," I suggest you allow yourself the full introduction via Ronni's book and a few jars of the stuff, but here's what you need to know: Sorghum is a grass that resembles corn and similarly can be processed to produce grain. Sweet sorghum varieties, however, can be crushed and processed to produce a molasses-like syrup. In the mountain South and parts of the Midwest, where it's been grown for sweetener since 1850, sorghum syrup is often referred to as "molasses," "sorghum molassses" or by some very old-timers, "sugar cane." If an Appalachian or Midwestern rural recipe from that era calls for "molasses" it's likely that sorghum syrup was what was actually used, as it was readily available and affordable for farm and mountain families.
Though in mainstream contexts, sorghum fell out of favor with the boom of the industrial food system, it has persisted in mountain communities and is now making a comeback with increased interest in traditional, regional foodways. It's a dream ingredient-- sweet but not saccharine nor as bitter as molasses, with a complex savory flavor that varies depending on provenance and process-- a distinct terroir.
I've been baking with it for a while now, and was beyond delighted when Ronni asked me to contribute a dessert to Sorghum's Savor. I liked the idea of doing a pandowdy--essentially a cobbler differentiated by the use of "molasses" as a sweetener and the spooning of filling over the biscuits at the end of the baking time. Fresh peaches and cornmeal biscuits complete the trifecta with sorghum for a hearty summer dessert, which Ronni calls, "Emily's Howdy Pandowdy with Cornmeal Biscuit Top." I recommend enjoying it with a big scoop of homemade vanilla custard.
Appears as "Emily's Howdy Dowdy Pandowdy with Cornmeal Biscuit Top" in Ronni Lundy's Sorghum's Savor
Ingredients
For the cornmeal biscuit top:
3/4 cup all-purpose flour
1/4 cup cornmeal (I use Wholegrain Kentucky Heirloom Cornmeal)
1 Tablespoon white sugar
1 1/2 teaspoons baking powder
1/4 teaspoon salt
3 Tablespoons unsalted butter
1/2 cup heavy cream or buttermilk
Turbinado sugar, for dusting
For the filling:
6 cups peaches, cut into 1/4 to 1/2-inch wedges
1 teaspoon fresh lemon juice
1/2 cup all-purpose flour
2/3 cup sorghum syrup
1/4 teaspoon fresh ginger, zested and peeled
1/4 teaspoon salt
Directions
1. In a medium bowl, whisk together flour, cornmeal, sugar, baking powder, and salt. With a knife and fork or pastry cutter, cut in the butter until mixture resembles the consistency of cornmeal and peas. Add cream and stir gently to combine.
2. Form dough into a ball and cover with plastic wrap. Store in the fridge for at least 20 minutes while you prepare the filling.
3. Preheat oven to 375 degrees F. Lightly grease and flour the inside of a 9-inch cast-iron skillet, or if that is unavailable, a deep casserole dish of similar size.
4. In a medium bowl, combine peaches, lemon juice, flour, and sorghum. Stir in the ginger as well as the salt. Pour filling into the prepared skillet. Cover top with foil and bake for 25 minutes.
5. While filling is baking, roll out chilled biscuit dough on a clean, floured surface into a 9-to-10-inch circle. Cut 6 to 8 rounds with a biscuit cutter and set aside.
6. Once filling has baked, remove from oven, and arrange cut biscuits evenly over the filling. Sprinkle with Turbinado sugar. Return to the oven and bake for 20-25 minutes more, until biscuit dough is light golden and filling is bubbling.
7. Remove from the oven and spoon some of the steaming filling over the biscuit top (this little move is a defining characteristic of a pandowdy, along with the use of molasses or sorghum in the filling!). Return to the oven to bake for 5-10 minutes more. Remove from oven and let cool. Serve slightly warm with a scoop of homemade vanilla custard.
Thanks to Food52 for featuring this post in 8 Food Blog Links We Love!
Related recipes:
Apple-Raspberry Pandowdy
Black Walnut Pie
Peach-Blackberry Cobbler
Surry County Peach Sonker with Dip
Friday, July 31, 2015
The Friday Pie Slice: Homemade Bagel Edition
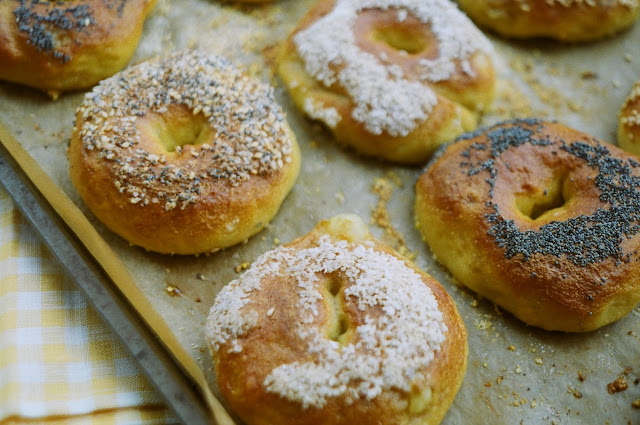
1st slice. I love making homemade bagels and Peter Reinhart's recipe via Smitten Kitchen has never failed me. I generally stick to the classics-- sesame seed, poppy seed, salt, and everything-- but tend to go wild with different flavored butters and cream cheeses.
2nd slice. I shared my Pimento Cheese and Tomato Pie recipe and some Green Tomato Pie history in the Washington Post Express this week. Find the recipe here and article here.
3rd slice. If you're making pimento cheese, you're going to need some mayo. Chefs share their penchant for Duke's Mayonnaise, accompanied with illustrations by my friend Emily Wallace, in Garden & Gun.
The tasty crumbs. SAVEUR recently profiled Indiana Sugar Cream Pie. Find Hoosier Mama's recipe here.
Wednesday, July 22, 2015
"Old Fashioned" Cherry Galette
But until I actually sat down to research the history behind angostura, it remained something of a mystery-- a curious concoction with an oversized label and exotic name. As I know now, some of that secrecy has been purposely maintained by the company. What we do know, though, is that Angostura bitters are named after the village in Venezuela where they were invented in 1824 by the German doctor Johann Siegert. They were first dubbed Dr. Siegert's Aromatic Bitters and were initially intended as an alleviative for stomach ailments and seasickness. Imported by Britain in 1830; the Royal Navy liked to mix it with gin creating the popular nautically-inclined drink "pink gin."

In 1875, Siegert's sons moved the company to Trinidad, where it still resides, and in 1904 they changed the name to Angostura. The ill-fitting label is legendarily due to the fact that the two brothers did not discuss bottle and label sizes prior to affixing one to the other, but they decided to keep it as a trademark. The recipe however, remains highly protected-- part of the reason the Angostura shortage caused such a hubbub a few years ago.
Lately, in addition to my drinks, I've been using Angostura and other bitters in my baked goods-- a trick I learned from the 4 and 20 Blackbirds Cookbook. The flavor is subtle, once baked, but it contributes a little complexity and aromatics to the filling. I added a dash of it along with some bourbon barrel-aged vanilla to this cherry galette, and gave it the "old-fashioned" name for the pairing of those with sweet cherries. Like most cherry desserts, this is perfect with a scoop of vanilla ice cream.
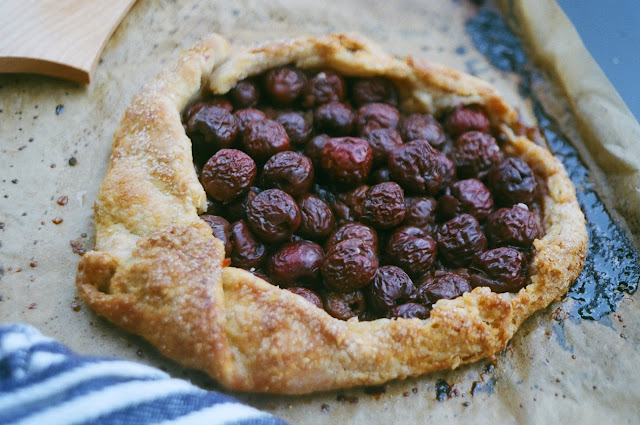
"Old Fashioned" Cherry Galette
Ingredients
For the cornmeal crust (or use Nothing in the House pie crust, halved):
1 1/2 cups unbleached all-purpose flour
1/2 cup cornmeal (I used this Whole Grain Kentucky Heirloom Cornmeal)
1/2 Tablespoon granulated sugar
1 teaspoon sea salt
1 1/2 sticks COLD unsalted butter (12 tablespoons), cut into slices
1 large beaten egg, cold
1/4 cup ice-cold water
1/2 Tablespoon cold apple cider vinegar (I keep mine in the fridge)
For the filling:
3-4 cups sweet cherries, pitted
3-4 Tablespoons granulated sugar (depending on sweetness of the fruit)
1 teaspoon angostura bitters
1 teaspoon bourbon or vanilla extract (I used vanilla aged in bourbon barrels)
1 Tablespoon fresh lemon juice
2 Tablespoons turbinado sugar for dusting
1 large beaten egg + 1 Tablespoon whole milk for egg wash
Directions
1. For the crust: In a large mixing bowl, whisk together the flour, cornmeal, sugar, and salt. Using a pastry cutter or fork and knife, cut in the butter. You want to make sure butter chunks remain, as that's what makes the crust flaky.
2. In a separate small bowl, whisk together the COLD liquid ingredients (Using cold liquids ensures that your butter will not melt--another crucial detail for a flaky crust).
3. Pour the liquid mixture into the flour-butter mixture and combine using a wooden spoon. Mix until dough comes together, but is not overly mixed (it should be a little shaggy). Form into a ball, cut in half, and flatten each half into a disc. Wrap discs tightly with plastic wrap, and let chill in the refrigerator for at least an hour.
4. While crust is filling, prepare filling: In a large mixing bowl, combine pitted cherries, sugar, bitters, bourbon, and lemon juice. Remove one dough disc and leave other in fridge or freezer for another use. Roll out one crust disc on a piece of parchment and transfer rolled crust and parchment to a large baking sheet.
5. Preheat oven to 375 degrees F. Ladle cherry filling onto rolled crust, leaving a 1-inch border. Sprinkle 1 Tablespoon of Turbinado sugar over the apricots, then fold up the pastry over the edges of the filling, leaving most of the cherries uncovered.
6. Place galette in freezer for 20-30 minutes while the oven preheats. Once chilled, remove galette from fridge and brush the pastry with the egg wash and sprinkle lightly with the remaining 1 Tablespoon of sugar. Bake tart in the middle rack of the oven for 30-40 minutes, until the fruit is bubbling and pastry is golden brown. Let the tart cool completely. Serve just warm or at room temperature with vanilla ice cream.
Related recipes:
Apricot Galette with Cornmeal Crust
"Old-Fashioned" Peach Blackberry Pie
Sour Cherry Pie
Sweet Cherry Pie with Cornmeal Streusel
Subscribe to:
Posts (Atom)
Keep Your Fork
Blog Archive
-
►
2016
(23)
- December (2)
- November (2)
- October (1)
- September (2)
- August (1)
- July (2)
- June (1)
- May (1)
- April (2)
- March (4)
- February (1)
- January (4)
-
▼
2015
(33)
- December (1)
- November (1)
- October (3)
- September (3)
- August (1)
- July (4)
- June (2)
- May (2)
- April (4)
- March (5)
- February (4)
- January (3)
-
►
2014
(53)
- December (5)
- November (2)
- October (3)
- September (4)
- August (5)
- July (4)
- June (3)
- May (1)
- April (4)
- March (9)
- February (7)
- January (6)
-
►
2013
(72)
- December (7)
- November (8)
- October (4)
- September (7)
- August (3)
- July (4)
- June (1)
- May (2)
- April (10)
- March (9)
- February (8)
- January (9)
-
►
2012
(116)
- December (13)
- November (9)
- October (8)
- September (8)
- August (8)
- July (12)
- June (7)
- May (11)
- April (12)
- March (11)
- February (8)
- January (9)
-
►
2011
(85)
- December (8)
- November (9)
- October (10)
- September (6)
- August (1)
- July (10)
- June (9)
- May (3)
- April (5)
- March (13)
- February (3)
- January (8)
-
►
2010
(43)
- December (5)
- November (6)
- September (4)
- August (3)
- July (8)
- April (3)
- March (5)
- February (3)
- January (6)
-
►
2009
(44)
- December (4)
- November (9)
- October (4)
- September (6)
- August (5)
- July (5)
- May (1)
- April (1)
- March (5)
- February (2)
- January (2)
-
►
2008
(24)
- December (3)
- November (6)
- October (2)
- September (2)
- August (3)
- July (1)
- June (1)
- April (1)
- March (3)
- January (2)


