Friday, April 22, 2016

Katharine Hepburn Brownie Pie


There's a photo of me from the fourth grade: I have my hair curled (it was then in its pre-pubescent stick straight stage) and piled high on top of my head. I'm wearing a blue blazer and turtleneck, and holding a wooden tennis racquet, with over-sized sunglasses completing the look. The occasion was a class biography project in which we were to impersonate one of our heroes and I, in case you haven't guessed from my surely obvious costuming, was Katharine Hepburn.

At some point prior I had graduated from Shirley Temple movies to those of Hepburn and Grant, Hepburn and Tracy, Hepburn, Hepburn, Hepburn. This little obsession was perhaps prompted by my mother and grandmother, who presented Kate as the feisty, whip smart, and athletic alternative to the other silver screen starlets my classmates were ogling over (likely via a certain "classic movie" issue of the very '90s pre-teen rag, American Girl).

Me as Katharine Hepburn, 4th grade
I admired Katharine for all of those reasons my elders saw her as an alternative role model. As a nerdy tomboy, I identified with Kate's Bringing up Baby shenanigans, leopard in tow, her cunning smarts that bested Spencer Tracy in Desk Set, and her take no guff attitude in Pat and Mike. I also just found her hilarious. Subsequently, I devoured her autobiography, Me: Stories of My Life, with abandon, and upon learning that as a child, she lived as a boy for the summer, with her parent's buy-in, considered doing the same. Six or so years later, then a sophomore in high school, I got in a heated argument with my honors English teacher who insisted that Katharine and that other Hepburn, Audrey, were sisters. I told her she was wrong, exclaiming, " I know for a fact-- I've read Me!," "So have I," she countered. Well, someone was lying and it wasn't me. 

Later in college, my older friend Ben who worked at Houghton Mifflin for his first job out of school, sent a spare copy of Ruth Reichl's bright yellow Gourmet Cookbook to my group house in Ann Arbor. The first recipe I discovered and ever made from there was Katharine Hepburn's brownies, sourced allegedly from the Hepburn family by a friend of food writer Laurie Colwin's. I've worn that page (688) out, so much that the cookbook now opens directly to it.

The recipe makes the best brownies-- fudgy and dense, they're the only ones I ever make. They're also incredibly simple-- fitting I think, for Kate-- a woman who appreciated luxuries, no doubt, but wouldn't let her get to carried away about them, always tempering her approach with that stubborn blue-blooded New England practicality.

Here, I have Hepburn's brownies the pie treatment, altering the recipe just slightly (I reduced the sugar by 1/4th of a cup) and using it as the filling in a pie crust. It's a Chocolate Chess Pie, essentially, but the richest one you ever had. The added salt and bite of the crust balances that out a bit, and of that, I think Kate would approve.


Katharine Hepburn Brownie Pie

Ingredients
Nothing in the house pie crust, halved
1/2 cup (1 stick) unsalted butter, cut into tablespoons
2 ounces unsweetened chocolate, chopped
3/4 cup sugar
2 large eggs
1/2 teaspoon vanilla extract
1/4 cup all-purpose flour
1/4 teaspoon salt

Directions
1. Prepare half of Nothing in the House pie crust as per the directions, reserving the leftover egg for an egg wash and saving other half of the recipe in the freezer for a future pie. Chill dough at least one hour before rolling and fitting into a greased and floured 9-inch pie pan. Wrap with plastic wrap and place in fridge until ready to use. 

2. Preheat oven to 325 degrees F. In a medium-sized saucepan, melt butter with chocolate over low heat. Remove from heat and stir in sugar, eggs, and vanilla, beating until well mixed. Stir in flour and salt just until combined.

3. Pour filling into chilled pie crust and bake for 40-45 minutes, until a toothpick inserted in the center comes out clean. Let cool, then serve just warm or at room temperature. 


Related recipes:
Berger Cookie Pie
Chocolate Almond Cake
Chocolate Chess Pie
Cranberry Chocolate Chess Pie

Sunday, April 10, 2016

Key Lime Pie

Key Lime Pie | Nothing in the House

Somehow I've managed to keep a pie blog for 11 years without featuring Key Lime Pie. I've had Key Lime Pie Popsicles, Florida Citrus Pie, and Bill Smith's very similar Atlantic Beach Pie, but have up until now failed to include a straight recipe for the classic American dessert thought to have originated in the Florida Keys around 1890 (at least so says John Egerton and Nancie McDermott; in the Encyclopedia of American Food and Drink, John Mariani dates it as early as 1856). It's due time to rectify this omission.

Key Lime Pie's history is closely linked to the history of sweetened condensed milk, which Gail Borden began producing just before the Civil War. The canned product found particular traction, in those days before pre-refrigeration, in areas where fresh milk was not readily accessible. Such was the case in southern Florida.

The original Key Lime Pie recipe was likely inspired by another classic pie-- In 1947 the New York Times called it "the equivalent of a lemon meringue pie made with the small, juicy key limes" (Food Timeline). The small, green-yellow citrus fruits, though, were plentiful in the Florida Keys, and were combined with sweetened condensed milk to create a dessert initially distinctive of the region.

Key Lime Pie | Nothing in the House

While the original recipe called for pastry crust, graham crackers are now standard, with some variations employing vanilla wafers, gingersnaps, or occasionally, Ritz crackers. Whether the pie should be topped with whipped cream or meringue can still be a point of contention, though the majority of Key lime pies today opt for the cream.

This version, adapted from Alison Kave's First Prize Pies, is a fairly standard recipe, adding an ample dose of lime zest for extra zing. I think it's the perfect combination of tart and sweet. It's best if you use the smaller Key limes, generally available in the winter months, bought in bulk mesh bags at most grocery stores. If you can't find them, though, regular limes will certainly do.

Key Lime Pie | Nothing in the House

 Key Lime Pie
Adapted from First Prize Pies

Ingredients
For crust:
1 1/2 c. graham cracker crumbs
5 Tblsp. unsalted butter
1 Tblsp. sugar
1/4 tsp. salt

For filling:
1 14-ounce can sweetened condensed milk
3/4 cup Key lime juice (from 20-25 limes or 5-6 regular limes)
4 large egg yolks
Zest of 4 Key limes or 11/2 regular limes
1/4 teaspoon salt
Key lime slices, for decoration (optional)
Whipped cream (optional)

Directions
For the crust:
1. Preheat oven to 350 degrees F. Pour graham cracker crumbs in a bowl and stir in melted butter, sugar, and salt until well mixed.

2. Pat the buttery crumbs into a 9-inch pie pan, pressing mixture into the bottom and sides to form a pie crust. Place in oven and bake until crust is lightly browned, about 10-12 minutes. Place on a cooling rack and let cool to room temperature before adding the filling.

For the filling:
1. In a large bowl, whisk together the sweetened condensed milk, lime juice and zest, egg yolks, and salt until blended and frothy. Pour the filling into the baked and cooled pie crust and bake for 15-20 minutes until the filling has just set and bubbles begin to appear. 

2. Remove pie and let cool on a wire rack at room temperature for 20 minutes before refrigerating. Refrigerate at least 1 hour to set. Serve with lime slices and whipped cream, if desired. Enjoy!

Key Lime Pie | Nothing in the House

Related recipes:
Atlantic Beach Pie
Florida Grapefruit-White Chocolate Pie
Key Lime Pie Popsicles
Lime Bundt Cake
Lime and Raspberry Italian Meringue Pie

Thursday, March 24, 2016

Lime Bundt Cake


It seems we've turned the corner. Though I'm generally a fan of winter, there is something that happens on that first warm short-sleeved day when we remember what we've been missing the past four months.

On the first day of spring, I was driving west through the mountains on the way back from the Appalachian Studies Association Conference in charming Shepherdstown. In the higher elevations, there was a light, blustery snow which turned to a cold rain as I neared home. I was exhausted and my head was spinning from the whirlwind of ideas and work shared at the conference. I kept coming back, in particular, to the presentation from my friend and filmmaker Tijah Bumgarner about the multiple emerging alternative narratives in Appalachia in the aftermath of the master narrative of coal. Her work on the diverse narratives and changes in the cultural landscape brought on by artists, writers, and filmmakers working in the region prompted me to consider how we are essentially also (re)creating or reimagining another distinct narrative through the work of the West Virginia Folklife Program. This is inevitably being created in the context of our oral histories, documentation, and programming that makes space for and gives voice to the everyday creative and cultural expression of West Virginians.

Certainly, I've been circling around that idea since I started here in November, and in a broad sense since I started studying and working in folklore, but framing it in the context of a narrative, or even as a distinct "text," helped me to conceive of the potential meaning-making and interpretation of this work. It's a helpful lens for me, former English major and teacher that I am, and brings more intention to my everyday tasks.


So while the first day of spring had us in a brief relapse in terms of weather and found me in a state of fatigue from a long week, it also brought a new perspective, not only from the conference, but in the active focus of my work. I've moved from a place of forging relationships and infrastructure, to being able to build on those contacts so that I can now step out into local communities with at least some known points of reference.

I had the day off on Monday, which provided the space to crystalize all I took in and settle back into my daily life in Charleston. Baking, as I've said before, is that process that grounds me in place. After so much socializing over the weekend, I didn't want to go out, so set on making something from what I had on hand at home. That turned out to be limes leftover from the Atlantic Beach Pie I'd made for Pi(e) Day, and other basic ingredients, coming together in this Lime Bundt Cake. I used some 1/3 coconut flour I'd received from Arrowhead Mills, and because I didn't have buttermilk, substituted in coconut milk leftover from another Pi(e) Day creation. I don't see why you couldn't use all coconut flour in this recipe if you wanted to go gluten-free. The cake was both moist and dense, tasted surprisingly of Fruit Loops, and offered that hint of green for the turn of seasons.


Lime Bundt Cake
Adapted from Life in the Lofthouse

Ingredients
For cake:
3/4 cup (1 1/2 stick) unsalted butter, softened
1 1/2 cup granulated sugar
2 Tablespoons lime zest
3 eggs
1/4 cup fresh-squeezed lime juice
2 cups all-purpose flour
1 cup coconut flour
1 teaspoon baking soda
Pinch salt
1 1/2 cups full-fat coconut milk

For glaze:
1 1/4 cup powdered sugar
1 1/2 Tablespoons fresh-squeezed lime juice
1/2 Tablespoon full-fat coconut milk
Lime zest and shredded coconut (optional)

Directions
1. For the cake: Preheat oven to 350 F. Butter and flour bundt pant and set aside. In the bowl of a stand mixer fitted with the paddle attachment, cream butter, sugar, and lime zest on medium speed until smooth. Beat in the eggs one at a time, then add lime juice until incorporated.

2. In a medium-sized bowl, combine flours, baking soda, and salt. Gradually add this dry mixture to wet mixture, alternating with the coconut milk.

3. Pour batter into the prepared bundt pan and spread evenly. Bake for 50 to 60 minutes, or until toothpick inserted in center comes out clean.

4. Remove cake from oven. Let cake rest 10 minutes in pan, then invert to a cooling rack. Let cake cool completely while you prepare the glaze.

5. For the glaze: Whisk together powdered sugar, lime juice, and coconut milk until smooth and no lumps remain. When cake is completely cool, drizzle glaze on top. Garnish with lime zest and shredded coconut, if desired. Slice cake and serve.


Related recipes:
Atlantic Beach Pie
Key Lime Pie Popsicles
Lime and Raspberry Italian Meringue Pie
Whiskey-Soaked Dark Chocolate Bundt Cake

Monday, March 14, 2016

Happy Pi(e) Day 2016!

Photo by Chris Chen from Pi(e) Day 2013 at The Dunes, Washington, D.C.

Happy Pi(e) Day! I hope you are enjoying the mathematical excuse of the day to gather with friends around the 2piR circular revolution that is PIE. I plan to celebrate this evening via a pie potluck with a few neighborhood pals here in Charleston's East End.

Here's a look at some past Pi(e) Day celebrations in D.C., North Carolina, and Texas and if you're looking for that special 3.14 recipe, you just may find it in the Nothing in the House recipe archive.

Wednesday, March 09, 2016

Beef Picadillo Pie with Mashed Potatoes


I was first introduced to picadillo-- the spicy beef dish traditional to Spain and other Latin American countries-- by the folks at La Mano Coffee Bar in Takoma, D.C. Shortly after they opened in fall of 2013, I stopped by for a coffee and quick lunch bite and tried their beef picadillo hand pie. It was heaven, with juicy tomatoes, ample spice and a touch of sweetness in a flaky, buttery crust. I've craved it ever since. Eventually, I worked up the courage to email them and ask for the recipe, a request which co-owner Anna Petrillo graciously obliged.

I've been making that beef picadillo pie often lately, finally settling on a somewhat adapted recipe that works well as a main course as well as a potluck contribution. While some picadillo includes raisins and olives, I veer towards spicy and tang rather than sweet and salty. Gordy's Thai Basil Jalapeños are perfect for that extra kick, and the addition of the crust and mashed potato toping provides the antidote to the heat.


Anna included a few additional tips with her recipe, which I'll include here:
I did not grow up eating picadillo, but I have always enjoyed dishes that start with a base and can be modified to one's own tastes and depending on what's in the cupboard. Over the years I have had many versions of picadillo made by friends, during traveling, and in restaurants. Everyone has their own take on it. I think the important points to remember for this are:

1) Make sure you mince up the ground beef into as small as chunks as possible as it's cooking ("picadillo" means "mince") so the meat can absorb and be coated with the spices and sauce.
 2) Try to create a balance of all the main flavors: 1) sweet, 2) salty/tangy, and 3) spicy. Tomatoes, olives, and raisins seem to be common elements but it's fun to experiment with ratios or look for items in your pantry that you can throw in to create those flavors. I've made it with all types of brined items like anchovies and olives, different types of vinegars or wine, and different spices like thyme, tumeric, bay leaf, etc. 
For a hand pie, because you're only getting three or four bites, and it all has to stand up against a salty, buttery crust, you want a lot of flavor packed in the meat. So I go heavy on all the flavors. It also helps if you let the mixture sit overnight to allow the flavors to blend. The meat mixture is also delicious just with rice and beans or tortillas if you don't want to use it as a stuffing. Good luck!

Beef Picadillo Pie with Mashed Potatoes
Adapted from La Mano Coffee Bar

Ingredients
Nothing in the House pie crust, halved

For the beef picadillo:
1 1/2 pounds ground beef
1 onion, diced
4 cloves garlic, minced
5 shallots, minced
1 ounce ginger root, finely grated
1 teaspoons dried oregano
1/2 teaspoon ground cumin
1 teaspoon red pepper flakes
1 1/2 teaspoons fennel seed
1/4 cup chili powder
1 teaspoon salt (more, to taste)
1/4 teaspoon cinnamon or allspice (optional)
1/2 Tablespoon Sriracha (optional to taste)
1 large can (about 25 ounces) crushed tomatoes
1/4 cup capers
1/4 cup Gordy's Thai Basil Jalapeños (or other pickled jalapeños)
1/8 cup vinegar
1/8 cup lime juice
1 bunch cilantro leaves, chopped
1/2 Tablespoon cornstarch
Olive oil
1/2 teaspoon sugar (optional, to taste)
Egg wash (leftover 1/2 egg and 1/2 Tablespoon whole milk or cream)

For the mashed potatoes:
2 pounds Yukon gold potatoes
1/2 Tablespoon salt, plus more to taste
1 cup whole milk or heavy cream
4 Tablespoons unsalted butter
Pepper, to taste

Directions
For the crust:
1.  Prepare half of Nothing in the House pie crust as per the directions, reserving the leftover egg for an egg wash and saving other half of the recipe in the freezer for a future pie. Chill dough at least one hour before rolling and fitting into a greased and floured 9-inch pie pan. Wrap with plastic wrap and place in fridge until ready to use. 

For the beef picadillo:
1. Brown ground beef in olive oil (if needed) until cooked through and no more pink remains. Add the onion, garlic, and shallots, cooking over medium high heat until onions are softened and translucent. Mix in the ginger root, oregano, cumin, red pepper flakes, fennel seed, chili powder, and salt 1 teaspoon salt. Add in the cinnamon or allspice and Sriracha, if using. Cook for another few minutes until spices are fragrant. Use a large spoon to break up the meat chunks until finely chopped. 

2. Add in crushed tomatoes, capers, jalapeños, vinegar, and lime juice. Simmer 20 minutes or until the liquids are reduced, continuing to break up meat chunks. If the mixture seems too dry, add some water.

3. Add chopped cilantro leaves and 1/2 tablespoon cornstarch, pre-dissolved in small amount of water. Simmer 1-2 minutes until the mixture is a little thickened. Taste for salt, adding more if necessary. If too tangy, add sugar, to taste. Once cooked, allow mixture to cool to room temperature before filling pie crust.

For the mashed potatoes:
1. Peel potatoes and cut into quarters. Place in a pot, covered with water and 1/2 Tablespoon salt. Bring to a boil over low heat until potatoes are soft and tender when pierced with a fork. Drain potatoes and return to the pot or the bowl of a stand mixer fitted with the paddle attachment.

2. With the mixer, immersion blender, or a potato masher, mash potatoes until smooth. Add butter, stirring quickly to melt. Mix in milk or cream, then add salt and pepper to taste.

To assemble:
1. Preheat oven to 350 degrees F. Scoop beef picadillo filling into refrigerated pie crust, filling just to the beginnings of the crust flute (you may have some leftover filling). Mound mashed potatoes on top. Brush crust with egg wash. Place pie in oven and bake for 30 minutes until crust is browned and filling is bubbling. Serve warm and enjoy!


Related recipes:
Frito Pie
Gordy's Cherry Pepper Spread Galette
Heirloom Tomato Hand Pies with Bacon, Cheddar & Thai Basil Jalapeños
Pimento Cheese and Tomato Pie
Tomato, Bacon & Jalapeño Pie

Tuesday, March 01, 2016

Kimchi Bloody Mary


This past weekend I attended the Appalachian Storytellers edition of the Blind Pig Supper Club at Claxton Farm in Weaverville, North Carolina. One of my favorite dishes on the star-studded menu was Louisville chef Ed Lee's Pork Schnitzel with Gravy, Chow Chow, Kimchi Purée & Ham Salt. What made it particularly good was the balance of the sweet and thick chow chow with the fine, spicy hot kimchi. More affirmation that I really need to make it to one of his restaurants some day.

The specific taste of Lee's kimchi purée was familiar and I realized that it was this Kimchi Bloody Mary that it reminded me of. I developed this recipe for the gals at Gordy's Pickle Jar, but it's inspired by the amazing kimchi bloodies at the D.C. Korean restaurant Mandu-- a brunch favorite no longer convenient now that I live in West Virginia. This recipe is a close second and is still one of the best bloody marys I've ever had, topping the list along with Mandu's and my friend Mike's homemade version we had in the Lost Creek Farm sauna this New Year's Day.

The recipe works best with Gordy's spiced and briney Bloody Mary Mix, but if you can't source that where you are, substitute your favorite mix, whether store bought or homemade.


Kimchi Bloody Mary

Ingredients
1/2 cup of kimchi, processed in a food processor until very fine
1 1/2 Tablespoons rice wine vinegar
Juice of 1/2 lime (reserve other half for garnish)
1 teaspoon fresh ginger, chopped very fine
1 1/4 cup Gordy's Bloody Mary Mix (or your favorite mix, store bought or homemade)
1 squirt of Srirachi sauce, to taste (optional, as Gordy's mix is already spicy!)
3 ounces vodka
1 cup ice cubes

Directions
In a blender, combine all ingredients, reserving the ice. Divide ice into 2 glasses and pour drink mixture over ice. Serve with a lime wedge. Cheers!

Related recipes:
Colcannon Pie
Gordy's Cherry Pepper Spread Galette
Heirloom Hand Pies with Bacon, Cheddar & Thai Basil Jalapenos
Mayday Cocktail

Wednesday, February 17, 2016

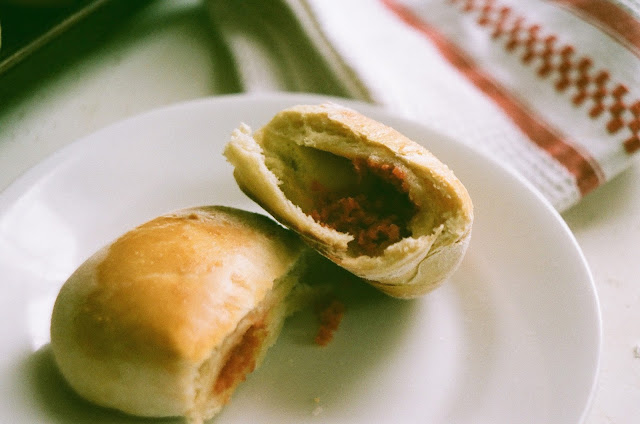
Homemade Pepperoni Rolls


When I was moving from D.C. to West Virginia, I told people I was trading in my half-smokes for pepperoni rolls, both being the iconic cheap convenience foods of the respective places. Though pepperoni rolls are most prevalent in the Western part of West Virginia, where there's a concentration of residents with Italian heritage, the stuffed rolls are now found throughout the state.


Fairmont baker and former miner Giuseppe "Joseph" Argiro, originally from Calabria, Italy, is credited with creating the first pepperoni roll in 1927. He had observed his fellow miners eating pepperoni with bread while at work, and decided to combine the two into a easily portable pocket food (miners have a history of inspiring delicious pocket foods--if you've ever had a Michigan pasty, you know what I'm talking about). Argiro founded the Country Club Bakery where he sold the rolls, and eventually passed the business on to his son Frank "Cheech" Argiro. It's still in operation today.


The classic pepperoni roll uses pepperoni slices or sticks, rolled in white bread dough (not pizza dough, like stromboli), and does not include cheese. Though perceived as sacrilegious by some, variations can employ shredded pepperoni, cheese, peppers, and even chili. In my opinion, a good pepperoni roll needs no extra flavor or moisture, as the oil of the pepperoni roll is absorbed by the bread, creating that telltale orange hue along the edges. That key pepperoni roll truth is deemed unappetizing to some (like my boss), but delicious to many (like me).

Of course upon establishing myself in the Mountain State, I knew I needed to try my hand at the things, and I found this recipe from Kendra Bailey Morris via American Food Roots. I made them during the blizzard last month, and they weathered us all the way through the storm.


 Homemade Pepperoni Rolls
Adapted from Kendra Bailey Morris via American Food Roots

Ingredients
For the rolls:
1 package (2 1/4 teaspoons) active dry yeast
½ cup warm water
½ cup plus ½ teaspoon sugar
1-2 white potatoes, peeled and cut into large pieces
½ cup unsalted butter, very soft
1 teaspoon salt
1 egg
7-8 cups all-purpose flour
1 ½ (about 1 pound) pepperoni stick, cut into thin slices

 For the glaze:
1 tablespoon unsalted butter
2 teaspoons sugar
1 large egg

Directions
1. In a small bowl, combine yeast, warm water, and ½ teaspoon sugar until yeast dissolves. Let stand at room temperature for 45 minutes until foamy.

2. Meanwhile,  place potatoes in a pot with at least three cups of water (enough to make approximately 2 ½ cups leftover potato water) and cook until tender.

3. In a blender, pulse cooked potatoes and 2 1/2 cups potato water in a blender. Add the ½ cup sugar, butter, and salt, blending well. Add the egg and blend 5 seconds more. Let mixture cool to lukewarm.

4. Once cool, pour potato mixture into the bowl of a stand mixer fitting with the paddle attachment, mixing in the yeast. Slowly add 4 cups of flour and beat until smooth. Add 3-4 more cups of flour and knead until the dough is fairly stiff but still a little sticky. Place dough in a large greased bowl and cover with plastic wrap. Place in the refrigerator for at least 8 hours or overnight. (Note: the dough will keep in the fridge for 5 to 6 days. Be sure to push down the dough at least once per day.)

5. When you're ready to bake, preheat the oven to 400 degrees F. Turn dough onto a floured board and cut into quarters. Continue to cut into roughly 40 small pieces. Take a piece of the dough and push it flat into a rectangle. Place 2-3 slices of pepperoni in the middle (overlapping and not stacking) and roll, pinching the ends of the dough to hold the pepperoni inside. Place on an ungreased baking sheet. Repeat until you’ve used up all of your dough and pepperoni.

6. In a small saucepan, melt the butter and sugar. Remove from the heat and let cool slightly. Add your egg and mix well. Brush tops of the rolls with this mixture, then bake them until golden brown, about 12 to 15 minutes.


Related recipes:
Breakfast Pizza with Sausage, Greens, and Fried Eggs
Buffalo Chicken Fried Pies
Pretzel-wrapped Sausages with Homemade Beer Mustard
Savory Heirloom Tomato Ricotta Galette

Friday, January 22, 2016

Chocolate Almond Snow Day Cake

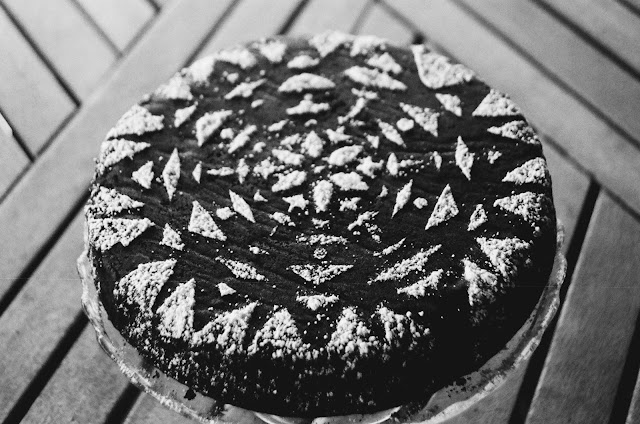
Chocolate Almond Snow Day Cake with Snowflake

I'm currently camped out at my friends' house, stretched out on the couch as I look out the window to a foot of snow on the ground, with much more on the way. I've got a stack of books at my feet, a to-do list on my lap, and between my house and theirs, a stockpile of beer, wine, and ingredients for lemon bars, brownie pie, pepperoni rolls, bourbon snow creams, and leftover gumbo. In my living room, new-to-me cross-country skis are waiting to be waxed and balls of yarn are ready to be knit into a cardigan. There's something about a snow day stretched ahead of me that inspires a childlike possibility-- the hours seem longer, the neighborhood suddenly becomes a mysterious world to explore, and creations-- whether edible, textile, or otherwise-- beg to be created.

I won't linger here long in favor of all the snow day left to be lived, but I remembered this cake I made over the holidays and it struck me as a perfect wintery weather-bound project. Hearty, rich, and not too fussy, it's just the thing I'd want to pair with one of those bourbon snow creams after skiing the city streets. Most of the ingredients are those you're likely to have at home, and you could substitute the almonds for other nuts-- I imagine hazelnuts, pecans, and walnuts would all do the trick. When I made this at Christmas, my mom cut out a paper snowflake, which I put on the cake to use as a stencil for a powdered sugar dusting-- another worthy snow bound endeavor.

Chocolate Almond Snow Day Cake with Snowflake

Chocolate Almond Cake
Adapted from Nigel Slater via The Guardian

Ingredients
7 ounces (200g) fine dark chocolate (60% or more)
1 ounce hot espresso or very strong coffee
14 Tablespoons unsalted butter, cut into cubes
2/3 cup all-purpose flour
1 teaspoon baking powder
2 Tablespoons good quality cocoa powder
5 large eggs, separated
1 cup granulated sugar
4 ounces almond meal (or finely ground almonds)

Directions
1. Butter and line 9-inch cake pan with parchment paper and set aside. Preheat the oven to 350 degrees F.

2. Break or chop the chocolate into small pieces and place in the top of a double boiler or in a bowl over gently simmering water. As soon as the chocolate begins to melt, pour the hot espresso or coffee over it.  Drop the cubed butter into the chocolate and coffee, but do not stir.

3.  Keeping an eye on the chocolate, whisk together the flour, baking powder, and cocoa in a medium-sized bowl. Set aside.

4. Separate the eggs, dropping the egg whites into a large bowl and the yolks into a separate small bowl. Whisk the whites till they are thick and stiff then quickly but gently fold in the sugar with a large metal or wooden spoon and set aside.

5. Remove the chocolate mixture from the heat and stir to dissolve the remaining butter. Mix the egg yolks together then stir quickly into the chocolate, just until the ingredients come together. Fold the chocolate mixture firmly but gently into the egg whites and sugar.

6. Lightly fold in the flour and cocoa mixture, followed by the almond meal. Work slowly and firmly but lightly, making sure to not over mix. Transfer the batter into the greased and lined cake pan and bake for 25 minutes or until a skewer inserted in the middle comes out clean. Let cool, then decorate with powdered sugar if desired. Enjoy!

Related recipes:
Bittersweet Chocolate Pecan Pie
Chocolate Chess Pie
Whiskey-Soaked Dark Chocolate Bundt Cake

Tuesday, January 19, 2016

Cranberry Upside Down Cake

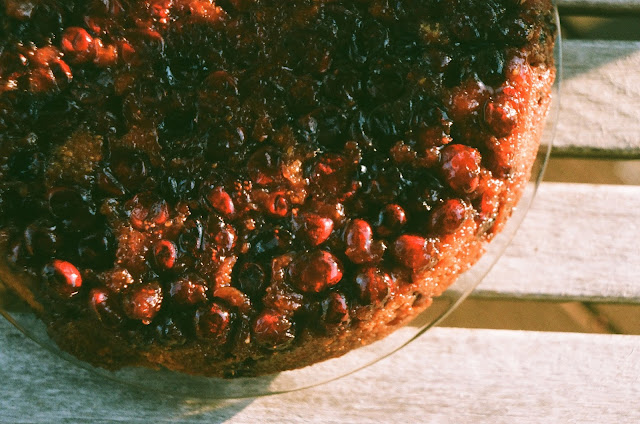
Cranberry Upside Down Cake on film

Last year I wrote about the origins of the native cranberry and the cultural history of the fruit in the Pine Barrens of New Jersey, as studied by Mary Hufford for the American Folklife Center. Now that I'm in West Virginia, I've been learning more about the cranberry glades here in the state-- in Monongahela National Forest and Dolly Sodds Wilderness. On New Years Eve when I was making a a lemon layer cake with cranberry curd and garnish, and my new friend Emily told me that she had harvested some cranberries in Tucker County this year, where Dolly Sodds is located. I assumed that they were the small wild cranberries I had seen up in Maine this September, but she said those she harvested were just as big as the store-bought variety I was using on the cake.

I'm looking forward to being in West Virginia for cranberry season this year, but for this Cranberry Upside Down Cake, I used more of the regular store-bought variety. Cranberries are my favorite thing to bake with in the wintertime-- their tartness is a pie baker's dream and their red hue is a welcome bright spot during winter's doldrums. I highly recommend stockpiling cranberries in your freezer when you can-- they don't always stick around in grocery stores past Christmas.

This cake, adapted from David Lebovitz, uses the pineapple upside down cake/tarte tatin principle, in which the fruit is caramelized in sugar over the stove, the batter or crust is poured over top, and the dessert is baked upside down in the same pan, then flipped so the fruit sits atop. Like ripping off a bandaid, it's best the flip is done in one swift motion and with courage.

I made this for Christmas dessert this year, along with a Lemon Chess Pie and Nigel Slater's Chocolate Almond Cake. It was a big hit, especially with my dad, who I still don't think has forgiven my mom and me for leaving the leftovers at our friends' house the next day.

Cranberry Upside Down Cake on film

Cranberry Upside Down Cake
Adapted only slightly from David Lebovitz

Ingredients
For the topping:
4 Tablespoons unsalted butter, cubed
3/4 cup light brown sugar, packed
2 cups (1 bag) fresh or frozen cranberries

For the cake batter:
1 1/4 cup all-purpose flour
1/4 cup coarse cornmeal
1 1/2 teaspoon baking powder
1/4 teaspoon salt
1/2 cup unsalted butter, cubed and at room temperature
3/4 cup granulated sugar
Grated zest of 1 small orange or lemon
2 large eggs
1 teaspoon vanilla extract
1/2 cup whole milk

Directions
1. For the topping: Place the butter and brown sugar in a 9- or 10-inch skillet over low heat. Mix and melt together, stirring constantly until the sugar is liquified. When the mixture begins to bubble, remove from heat and set aside.

2. For the cake: Preheat oven to 350 degrees F. In a small bowl, whisk together the flour, cornmeal, baking powder, and salt. Set aside.

3. In the bowl of a stand mixer fitted with the beater attachment, cream the 1/2 cup of butter, granulated sugar, and citrus zest on medium-high for 3-5 minutes until very light and fluffy. Reduce the speed of the mixer to medium and add the eggs one at a time, stopping in between to scrape down the sides of the bowl. Add the vanilla extract.

4. On low-speed, add half of the flour mixture, the milk, and then the remaining flour mixture, mixing just until combined. Do not overmix.

5. Evenly distribute the cranberries in the cast-iron skillet over the brown sugar mixture (You may need to re-heat the mixture on low if it has solidified). Pour the batter over the cranberries, then use a spatula to make sure it is evenly distributed over the berries.

6. Bake the cake until the "top" is golden brown and a toothpick inserted in the center comes out clean, 50-60 minutes. Remove from oven and after 10 minutes, run a knife around the edge of the cake. Place a cake plate over the top of the skillet and flip onto the plate (have courage!) until the cake releases from the pan. Serve cake warm and enjoy.

Related recipes:
Chocolate Cranberry Chess Pie
Cranberry Chess Pie
Cranberry Pie
Pear Tarte Tatin

Thursday, January 14, 2016

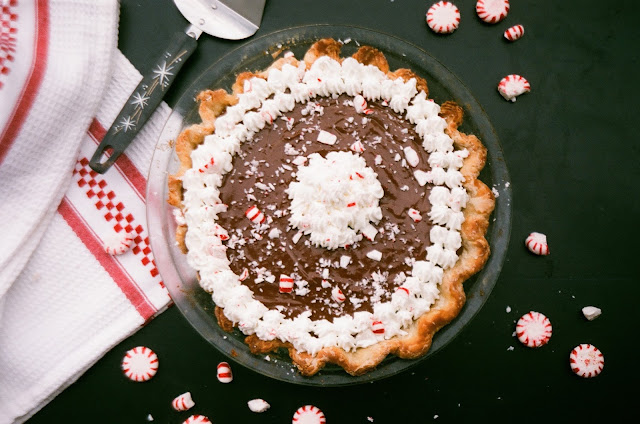
Chocolate Peppermint Cream Pie

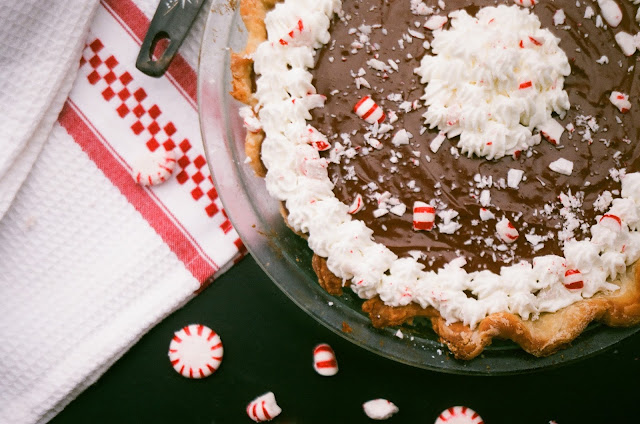
Chocolate Peppermint Cream Pie

Aside from holiday guides and Molly's beautiful illustrations, it's been a while since I've written a proper post. I do have a fairly justifiable excuse, though: at the end of October, I packed up my D.C. apartment, and with my parent's help, drove the 360 miles to my new home in Charleston, West Virginia. The move was prompted by my acceptance of a state folklorist position with the West Virginia Humanities Council-- a real dream job for me.

Since then, it's been a whirlwind-- a new city, a new state, a new apartment, a new job where I'm building a new program. I got an all-wheel drive car and a Janus-faced tortoiseshell kitten named Wren. I really like it here-- it's friendly and cheap and scrappy and coleslaw is an obligatory topping on all hot dogs. But it did take me a while to settle into my new place. Mainly, this was because the state of the kitchen was not especially conducive to baking, an activity that always grounds me in a new place. However, with my parents' help once again, a good dose of elbow grease, and a coat of paint, my kitchen is now a room where I don't mind spending a few hours, say, baking a pie.

Chocolate Peppermint Cream Pie

This Chocolate Peppermint Cream Pie was the first I made here. King Arthur Flour and Bon Appétit were both touting their Chocolate Cream Pie and I had brought with me an excess of homemade mint extract and peppermint candies from some past baking projects so I adapted the recipe to incorporate these. I had some leftover filling, which I scooped into ramekins for Chocolate Peppermint pots de crèmes, and I brought most of the pie into work the next day-- not a bad way to win the favor of your new coworkers.

Chocolate Peppermint Cream Pie

Chocolate Peppermint Cream Pie
Adapted from King Arthur Flour

Ingredients
For the pie:
Nothing in the House pie crust, halved
2 Tablespoons unsalted butter, cut into cubes
1 1/3 cups semisweet chocolate, chopped
1 Tablespoon peppermint extract (can add more or less to taste)
2/3 cup granulated sugar
3 Tablespoons cornstarch
2 Tablespoons unsweetened cocoa powder
1 teaspoon espresso powder, optional (for richer chocolate flavor)
1/8 teaspoon salt
3 large egg yolks
1 cup heavy cream, divided
2 cups whole milk
1 beaten egg + 1 Tablespoon whole milk or cream, for egg wash
Turbinado sugar, for dusting

For the topping:
1 cup heavy cream
1/4 cup confectioners sugar
1/2 teaspoon vanilla extract
1/2 cup peppermint candies (or leftover candy canes), crushed

Directions
For the crust:
1. Prepare half of Nothing in the House pie crust as per the directions, reserving the leftover egg for an egg wash and saving other half of the recipe in the freezer for a future pie. Chill dough at least one hour before rolling and fitting into a greased and floured 9-inch pie pan. Prick crust with fork all over the bottom. Place pie pan in the freezer for 1 hour to set before baking. Meanwhile, preheat oven to 350 degrees F.

2. Remove crust from freezer, line with parchment paper and fill with pie weights or dried beans. Blind bake crust for 20 minutes. After 20 minutes, remove paper and weights, brush with egg wash and dust with Turbinado sugar. Return crust to oven and bake for 5-8 more minutes more or until fully baked, puffed, and golden brown. Let cool while you prepare the filling.

For the filling:
1. In a medium mixing bow, place the chopped chocolate, butter, and peppermint extract. Set aside. In a medium saucepan off of the heat, whisk together the sugar, cornstarch, cocoa, espresso powder (if using), and salt. Whisk in 1/4 cup of cold heavy cream until the mixture is smooth and no lumps remain. Repeat with another 1/4 cup of the cream, then whisk in the egg yolks.

2. Put the saucepan over medium heat, and gradually whisk in the remaining cream and milk. Bring the mixture to a boil, whisking constantly for 1 minute. Remove the pan from the heat and pour the mixture over the chocolate and butter. Whisk until the chocolate is melted and the mixture is smooth. Pass the filling through a sieve into a bowl to make sure there are no lumps.

3. Place plastic wrap tightly over the surface of the chocolate mixture to prevent a skin from forming. Place in the fridge until completely chilled. Meanwhile, prepare the topping.

For the topping:
1. Pour the heavy cream into the bowl of a stand mixer fitted with the whisk attachment. Whip until the whisk begins to leave tracks in the bowl. Add the sugar and vanilla and whip until the cream holds a medium peak.

2. Transfer the chilled filling to the cooled and baked pie crust and smooth with a rubber spatula. Spoon or pipe the whipped cream on top of the filling. Chill the pie until ready to serve, then sprinkle with crushed peppermint candies.

Chocolate Peppermint Cream Pie Slice

Related recipes:
Chocolate Chess Pie
Dark Chocolate Lavender Tart with a Lemon Cardamom Crust
Grasshopper Pie
Homemade Peppermint Extract
Peppermint Pattie Tart

Wednesday, January 13, 2016

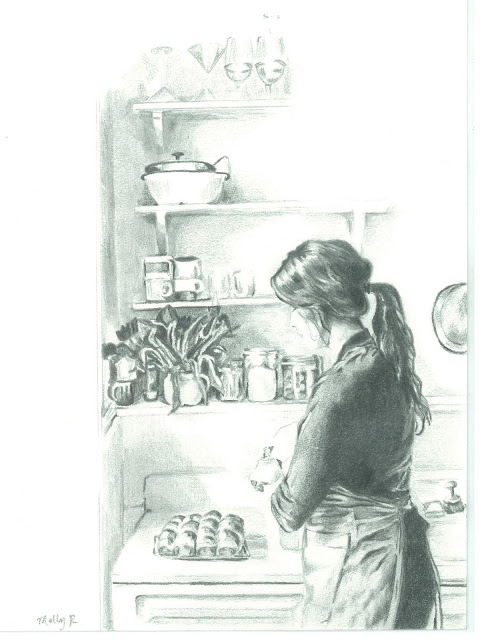
Molly Reeder's Kitchen Drawings

Illustration of Emily Hilliard of Nothing in the House by Molly Reeder
A couple of years ago, my friend Mack shot an interview with me as I prepared for our annual Pi(e) Day celebration at my home in D.C. In the interview, I talk about how I learned to bake from my mom and grandmother, so ask Mack was putting together the footage, she asked if I had any photos of them working in the kitchen that she could use as B-roll. I asked my mom, and she scoured albums and photo boxes, and found none. There were pictures of desserts she had made, of my brother and I blowing out candles on homemade birthday cakes, and of the family sitting around the table at Thanksgiving, but there were no images of her doing the actual labor of home cooking. 

That struck me as odd and unbalanced. It may be my folkloric tendencies speaking here, but for me the images of daily work-- in messy kitchens, basement workshops, or leaf-strewn yards-- carry more emotional and narrative weight than the posed and stifled family photos taken during vacations or at graduations and family reunions. They capture us in situ, and convey a story about who we are and what we do and make and value.

So I was particularly excited when artist Molly Reeder contacted me about her kitchen drawing project, in which she illustrating a series of images of cooks and bakers working in their home kitchens. She highlights this labor so beautifully, in grayscale pencil drawings that accentuate the gestures and stances of her subjects as they sprinkle sugar, wash dishes, or consult a cookbook recipe. Molly illustrated a photo of me taken by Mack during those Pi(e) Day preparations of 2014, and is working on an entire series, including the one below of Yossy Arefi of Apt 2B Baking Co

Illustration of Yossy Arefi of Apt. 2B Baking Co. by Molly Reeder

I'm honored to be a part of this project which so elegantly illuminates the daily activity of kitchens, and I can't wait to see the final exhibit. You can find more of Molly's work and more about the series via her website and on Instagram.

Wednesday, December 23, 2015

Christmas Pie Ideas


My trip home for Christmas has been delayed by a pesky migraine, but the upshot is that this extra recovery time offers me chance to squeeze in a little post before the holiday. Things have been busy for me, with a new city and job and all, and I realize my previous post was of a similar bent, just for Thanksgiving, but I'm looking forward to digging back in to some regular posts in the new year. In the meantime, enjoy your winter holiday celebrations, whatever they may be, and hope there's some sweetness to go with it. 

Chocolate
Chocolate Orange Pie with Mascarpone Cream
Chocolate Peanut Butter Pie with Nabs Crust, pictured top left
Milk Chocolate & Salted Caramel Hazelnut Tart
Peppermint Pattie Tart

Fruit & Nut
Bourbon Ginger Pecan Pie
Cranberry Pie, pictured bottom right
Fig-Pistachio Tarte Tatin
Shaker Orange Tarts

Preserves & Icebox
Almond & Grapefruit-Ginger Marmalade Crostata
Bakewell Tart with Apple Rosemary Jelly, pictured bottom left
Meyer Lemon Honey Marmalade Linzer Torte
Speculoos Icebox Pie

Cookies & Cakes
Pea & Corn Cookies
Sandy Spring Sand Tarts, pictured top right
Whiskey-Soaked Dark Chocolate Bundt Cake

Savory
Corn and Black Pepper Crackers
Ham, Gruyère & Caramelized Onion Galette with Fried Egg
Red & Golden Beet & Goat Cheese Tart
Tri-color Potato, Caramelized Onion, Goat Cheese & Rosemary Galette

As always, you can find many more recipes, via the Recipe Index.

Monday, November 16, 2015

Thanksgiving Pie Ideas

Thanksgiving pie recipes

This is the first time in ten years I'll have spent Thanksgiving with my family. This past decade of Friendsgivings, celebrated from Maine to Maryland, have always been a rowdy delight and have taught me about how to do holidays at the grown-ups table right-- I hope there are many more in store. But this year I'm looking forward to spending the day at home in Indiana. In the past few years, my family has become particularly fond of Hoosier Mama's Cranberry Chess Pie, so I expect to fulfill a request for one of those, but I'll also likely venture in to new territory-- a Pumpkin-Pecan Pie, Aurora Tart, or Apple Cider Cheesecake, perhaps? If you're also still deciding, here are a few suggestions for your Thanksgiving table-- both savory and sweet. If you don't find quite what you're looking for, check out the Recipe Index, as well as past guides from 20142013, and 2012.

Pumpkin, Squash & Sweet Potato
Delicata Squash Pie (pictured, top right)
Drunken Pumpkin Bourbon Pie with Mascarpone Cream
Pumpkin & Chai Spice Nut Butter Pie
Sweet Potato Pie with Cornmeal Crust
Sweet Potato Speculoos Pie

Fall Fruits
Apple Pie with Salted Caramel Glaze
Cranberry Chess Pie
Cranberry Pie
Red Wine-Poached Seckel Pear Tartlets (pictured, top left)
Persimmon Pie

Chocolate & Nuts
Bittersweet Chocolate Pecan Pie
Bourbon Ginger Pecan Pie
Chocolate Chess Pie
Cranberry Chocolate Chess Pie (pictured, bottom left)
Pine Nut & Honey Tart

Custard & Cheese
Cranberry Goat Cheese Tart with Almond Shortbread Crust
Kentucky Lemon Chess Pie
Maple Bourbon Buttermilk Pie with Apple Syrup
Pumpkin-Ginger Cheesecake Pie
Salty Honey Pie

Savory
Celery Ham Tart aka Pissaladière
Gordy's Cherry Pepper Spread Galette
Pear, Gruyere & Caramelized Onion Hand Pies 
Puff Pastry Hand Pies with Goat Cheese & Hot Pepper Jelly (pictured, bottom right)
Swiss Chard & Goat Cheese Galette

And whether from this list or not, I'd love to hear what you'll be making this Thanksgiving-- I may even have to borrow your idea. 

Cranberry Chess Pie

Fig Pistachio Tarte Tatin

Peppermint Pattie Tart

Whiskey & Dark Chocolate Bundt Cake

Blog Archive